
Ninja Coffee Maker with Frother Manual: A Comprehensive Guide (Updated 02/14/2026)
This manual details the Ninja Specialty Coffee Maker, functionally similar to the older Ninja Coffee Bar models, offering diverse brewing options and a built-in frother for café-style drinks.
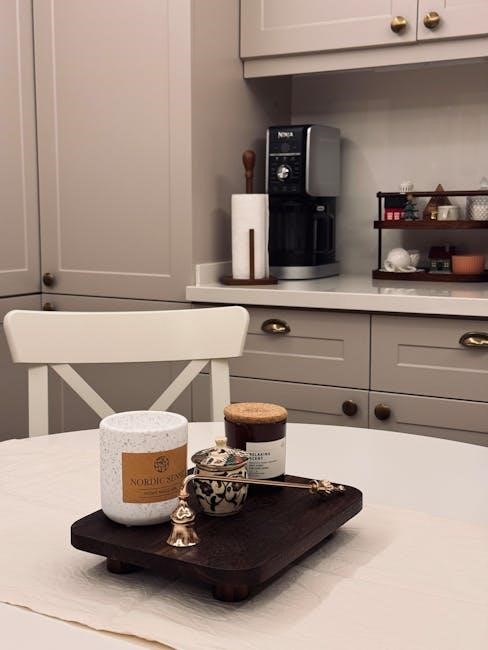
Welcome to the world of customizable coffee brewing! The Ninja Coffee Maker with Frother, often recognized as the Ninja Specialty Coffee Maker, delivers a versatile experience beyond standard drip coffee. This appliance isn’t just about brewing; it’s about crafting your perfect cup, tailored to your preferences.
Essentially, it’s the Ninja Coffee Bar reimagined, maintaining nearly identical functionality. You’ll discover a range of brewing styles – from a classic, balanced brew to a bold, rich flavor, and even options specifically designed for iced coffee. The integrated fold-away frother elevates your beverages, allowing you to create lattes, cappuccinos, and other specialty drinks with ease.

This manual will guide you through every aspect of your Ninja Coffee Maker, ensuring you unlock its full potential and enjoy consistently delicious results. Prepare to explore a new level of coffee enjoyment!
Understanding the Different Ninja Coffee Maker Models
Navigating the Ninja Coffee Maker landscape can seem complex, but core functionality remains consistent across models. While branding has evolved – transitioning from “Coffee Bar” to “Specialty Coffee Maker” – the underlying technology is remarkably similar; Key distinctions lie in capacity, aesthetic design, and bundled accessories.
You’ll find models offering varying carafe sizes, catering to individual needs or larger households. Some versions include a reusable filter, reducing the need for paper replacements. Feature sets are generally consistent, encompassing Classic, Rich, Over Ice, and Specialty brew options, alongside the integrated frother.
Regardless of the specific model, this manual provides comprehensive guidance applicable to most Ninja Coffee Makers with a frother. Always refer to your model’s specific quick start guide for unique features or variations.
Key Features and Benefits
The Ninja Coffee Maker with Frother boasts a versatile array of features designed to elevate your coffee experience. Its standout capability is the “Specialty Brew” function, enabling concentrated coffee for lattes and cappuccinos. Multiple brew sizes – from a single cup to a full carafe – offer customizable portions, minimizing waste.
The integrated fold-away frother allows for creating café-quality milk foam directly within the machine, simplifying specialty drink preparation. Distinct brew styles, including Classic, Rich, and Over Ice, cater to diverse preferences.
Benefits include convenience, cost savings (compared to daily coffee shop visits), and the ability to experiment with various coffee creations. The machine’s intuitive controls and easy-to-clean components further enhance usability.
Specialty Brew Options (Classic, Rich, Over Ice, Specialty)
The Ninja Coffee Maker offers four distinct brew styles to suit every palate. “Classic” delivers a balanced, everyday coffee. “Rich” extracts maximum flavor for a bolder, more intense brew. “Over Ice” concentrates the coffee, accounting for dilution when poured over ice, preventing a watery result.
The unique “Specialty” brew is designed for concentrated coffee, ideal for crafting lattes, macchiatos, and other specialty drinks when paired with the integrated frother. This setting produces a coffee base significantly stronger than standard brews.
Each option allows for adjustable brew sizes, providing flexibility. Experimenting with these settings unlocks a wide range of coffee experiences, from a light morning cup to a robust, café-style beverage.
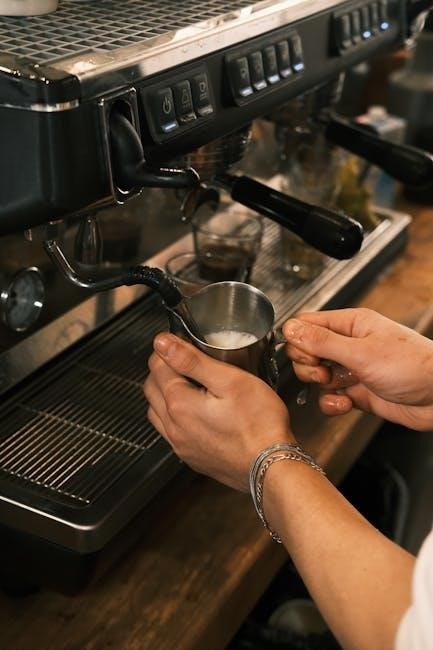
Fold-Away Frother – Functionality and Use
The integrated fold-away frother is a key feature, enabling users to create café-quality frothed milk directly within the Ninja Coffee Maker system. This convenient design eliminates the need for a separate frothing device, saving counter space and streamlining the beverage preparation process.
The frother utilizes a whisk attachment to aerate and heat milk, producing both hot and cold foam. It’s easily accessible and folds away neatly when not in use. Different milk types yield varying foam textures – more on that later!
Simply add your desired milk to the frother pitcher, select your preferred setting, and let the machine do the work. The frother is designed for both small and large quantities, accommodating single servings or multiple drinks.
Setting Up Your Ninja Coffee Maker
Before your first brew, proper setup is crucial. Begin by selecting a stable, level surface near a grounded electrical outlet. Unpack all components – the coffee maker base, water reservoir, carafe, filter basket, and frother pitcher – and remove any packaging materials.
Carefully position the water reservoir onto the base, ensuring it clicks securely into place. The carafe should be placed on the warming plate. Inspect the filter basket and confirm the included filter (or a compatible paper filter) is ready for use.
Familiarize yourself with the control panel, noting the buttons for brew size, brew type, and frother operation. A quick visual check ensures all parts are present and undamaged, preparing you for the initial cleaning cycle.
Initial Cleaning and Priming
Before brewing your first pot, a thorough cleaning cycle is essential to remove any manufacturing residue. Fill the water reservoir to its maximum fill line with fresh, filtered water. Do not add coffee grounds during this process.
Select the “Classic” brew setting and choose the largest brew size available. Place the empty carafe on the warming plate and initiate the brewing cycle. Allow the entire cycle to complete, discarding the brewed water afterward.
Repeat this process two more times with fresh water each time. This “priming” ensures the system is flushed and ready for optimal coffee flavor. This step is vital for a pristine first cup!
Water Reservoir and Filter Basket
The Ninja Coffee Maker features a removable water reservoir, clearly marked with water level indicators for different brew sizes – Cup, Travel, Half Carafe, and Full Carafe. Always use fresh, filtered water for the best tasting coffee and to minimize scaling.
The filter basket accommodates both a reusable filter (included) and standard #4 paper filters. Ensure the filter is properly seated before adding coffee grounds. For optimal flavor, rinse paper filters with water before use to eliminate any papery taste.
The reservoir and basket are dishwasher safe (top rack recommended) for easy cleaning. Regularly inspect the filter for buildup and clean thoroughly after each use.
Brewing Coffee: A Step-by-Step Guide
Begin by filling the water reservoir with the desired amount of fresh, filtered water. Insert a paper filter or the reusable filter into the filter basket, and add your preferred amount of ground coffee. Close the lid securely.
Select your desired brew size using the control panel – Cup, Travel Mug, Half Carafe, or Full Carafe. Choose your brew style (Classic, Rich, Over Ice, or Specialty) based on your preference. Press the brew button to start the brewing process.
The Ninja Coffee Maker will automatically brew and keep the coffee warm for a set period. Once brewing is complete, carefully pour and enjoy your freshly brewed coffee!
Using the Classic Brew Setting
The Classic Brew setting is ideal for everyday coffee enjoyment, delivering a balanced and flavorful cup. This setting provides a standard brewing process, perfect for those who prefer a traditional coffee taste. It’s a versatile option suitable for various coffee grounds and roast levels.
To utilize Classic Brew, ensure the water reservoir is filled and a filter is in place with ground coffee. Select your desired brew size (Cup, Travel Mug, Half Carafe, or Full Carafe) on the control panel. Then, simply press the “Classic” brew button.
The Ninja will brew a consistently smooth and satisfying coffee, perfect for starting your day or enjoying a midday break.
Utilizing the Rich Brew Setting
The Rich Brew setting elevates your coffee experience by extracting more flavor and aroma from your grounds. This setting employs a slower brewing process, resulting in a bolder, more intense cup of coffee – perfect for those who appreciate a robust taste.
To activate Rich Brew, follow the same initial steps as with Classic Brew: fill the water reservoir, insert a filter with coffee grounds, and select your desired brew size. However, instead of pressing “Classic,” press the “Rich” brew button on the control panel.
Expect a slightly longer brew time with this setting, but the resulting coffee will be noticeably richer and more flavorful, offering a truly satisfying experience;
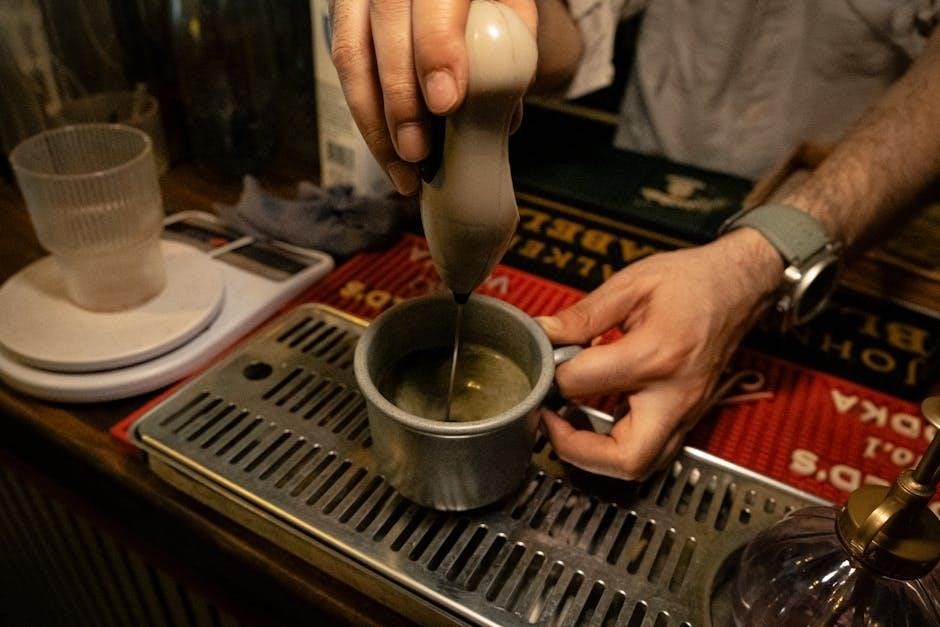
Brewing Over Ice for Iced Coffee
The Ninja Coffee Maker’s “Over Ice” function is specifically designed to deliver perfectly chilled, flavorful iced coffee without the watered-down taste often associated with pouring hot coffee over ice. This setting brews a concentrated coffee directly onto a carafe filled with ice.
To brew Over Ice, fill the water reservoir to the “Max Fill” line for iced coffee, add your desired amount of coffee grounds, and fill the carafe with ice. Select the “Over Ice” brew button. The machine will automatically adjust the brewing parameters for optimal concentration.
The result is a refreshing, full-bodied iced coffee that retains its rich flavor, eliminating the need for pre-chilling or excessive ice dilution.

Frothing Milk: Techniques and Recipes
The Ninja Coffee Maker’s fold-away frother transforms ordinary milk into luxurious, café-quality foam, enabling you to create a variety of specialty coffee beverages at home. The frother utilizes a whisk-like action to incorporate air into the milk, increasing its volume and creating a creamy texture.
For best results, use cold milk – whole milk generally produces the richest foam, but alternative milks like oat or almond can also be frothed. Fill the frother pitcher to the indicated fill line and select your desired frothing setting.
Experiment with recipes like lattes (more steamed milk, thin layer of foam) and cappuccinos (equal parts espresso, steamed milk, and thick foam) to discover your perfect coffee creation.
Creating Different Foam Textures (Latte vs. Cappuccino)
Achieving the perfect foam texture is crucial for distinguishing between a latte and a cappuccino with your Ninja Coffee Maker. Lattes require a microfoam – a velvety, smooth texture with tiny, uniform bubbles. This is achieved by frothing milk with the frother on a lower setting, creating a glossy sheen.
Cappuccinos, conversely, demand a thicker, more voluminous foam with larger bubbles. Utilize the frother’s higher setting for a longer duration to incorporate more air. The resulting foam should be substantial enough to sit atop the espresso and steamed milk.
Practice adjusting the frothing time and speed to master these distinct textures, elevating your home barista skills and enjoying authentic coffeehouse favorites.
Milk Types and Frothing Results

Different milk types yield varying frothing results with the Ninja Coffee Maker’s integrated frother. Whole milk consistently produces the richest, most stable foam due to its higher fat content, ideal for both lattes and cappuccinos. 2% milk froths adequately, though the foam may be less voluminous and dissipate quicker.
Non-dairy alternatives present unique challenges. Oat milk generally froths well, creating a creamy texture, while almond milk can be more difficult, often resulting in thinner, less stable foam. Soy milk offers moderate frothing capabilities.
Experimentation is key; adjust frothing times and settings based on your preferred milk type to achieve optimal results and personalized coffee creations.
Cleaning and Maintenance
Regular cleaning is crucial for optimal performance and longevity of your Ninja Coffee Maker. Daily cleaning involves washing the carafe, filter basket, and frother whisk with warm, soapy water. Avoid abrasive cleaners that could damage surfaces.
Descaling should be performed monthly, or more frequently in areas with hard water, using a descaling solution or a mixture of water and white vinegar. Run a full brew cycle with the solution, followed by several cycles with fresh water to rinse thoroughly.
The frother requires diligent cleaning to prevent milk residue buildup. Disassemble and wash all components after each use. Proper maintenance ensures consistently delicious coffee and extends the life of your brewer.
Descaling the Coffee Maker
Descaling removes mineral buildup, ensuring optimal brewing temperature and coffee flavor. Use a commercial descaling solution specifically designed for coffee makers, or a mixture of equal parts white vinegar and water. Fill the reservoir with the solution.
Run a full brew cycle without coffee grounds, using the ‘Classic’ brew setting. Repeat this cycle two to three times with fresh water to thoroughly rinse away any remaining descaling solution. A flashing ‘Clean’ light may indicate the need for descaling – consult your model’s specific instructions.
Regular descaling, typically every three months, prevents damage and maintains peak performance. Ignoring this maintenance can lead to reduced brewing efficiency and a shorter lifespan for your Ninja Coffee Maker.
Cleaning the Frother and Carafe
The fold-away frother requires immediate cleaning after each use to prevent milk residue buildup. Detach the frother and wash all components – the whisk and frothing attachment – with warm, soapy water. Rinse thoroughly and allow to air dry completely before reattaching.
The glass carafe is dishwasher safe (top rack recommended) for convenient cleaning. For stubborn coffee stains, a mixture of baking soda and water can be used as a gentle abrasive. Avoid using harsh chemicals or abrasive scrubbers that could damage the glass.
Regular cleaning of both the frother and carafe ensures hygienic operation and preserves the quality of your beverages. Inspect for any cracks or damage during cleaning.
Troubleshooting Common Issues

If the coffee maker fails to brew, ensure the water reservoir is properly filled and seated, and the power cord is securely connected. Check if the ‘Clean’ light is illuminated, indicating a descaling cycle is needed. Verify the brew setting is selected and the start/stop button has been pressed.
For a non-functioning frother, confirm it’s correctly attached and that the milk is within the recommended fill lines. Ensure the frother is selected as part of the brewing process. Inspect the whisk for any obstructions or damage.
Error messages require consulting the full manual for specific solutions, often related to descaling or component issues.
Coffee Maker Not Brewing
If your Ninja Coffee Maker isn’t brewing, first verify the unit is properly plugged in and the power outlet is functioning. Ensure the water reservoir is filled to the desired level and correctly seated within the machine; improper placement can prevent brewing. Check if the ‘Clean’ indicator light is illuminated, as this signals a necessary descaling cycle that must be completed before brewing.
Confirm a brew cycle has been initiated by pressing the appropriate brew size and style button. Also, inspect the filter basket to ensure it’s not overflowing or improperly inserted. A clogged filter can obstruct water flow and halt the brewing process.
Frother Not Working
If the fold-away frother isn’t functioning, begin by confirming it’s correctly positioned for use – fully extended and locked into place. Ensure the frother whisk is securely attached; a loose whisk won’t create foam. Verify there’s sufficient milk in the frother pitcher, as the frother requires a minimum amount to operate effectively.
Check for any milk residue or buildup around the whisk or inside the frother pitcher, as this can impede performance. A thorough cleaning is often the solution. Confirm the frother button is being pressed and held for the appropriate duration. If the issue persists, a reset of the coffee maker might resolve the problem.
Error Messages and Solutions
The Ninja Coffee Maker may display error messages indicating specific issues. “Prime” typically signals the need for initial cleaning or descaling – follow the priming instructions detailed in the manual. “Descale” indicates mineral buildup; initiate the descaling cycle using a descaling solution. “Add Water” means the reservoir is empty or not properly detected; refill and ensure correct placement.
If you encounter a “Clean” message, run the cleaning cycle. For other, less common errors, consult the full user manual or Ninja’s online support resources. Power cycling the unit (unplugging for a minute) can sometimes clear temporary errors. Document the error code when contacting customer support for faster assistance.
Ninja Coffee Maker vs. Other Brands
Compared to standard drip coffee makers, the Ninja offers significantly more versatility with its multiple brew styles – Classic, Rich, Over Ice, and Specialty. Unlike single-serve pod machines, it utilizes ground coffee, reducing waste and offering greater control over flavor. Against higher-end espresso machines, the Ninja provides a more affordable entry point to café-style beverages, though with less pressure and nuance.
Brands like Keurig prioritize convenience, while Breville focuses on precision. Ninja strikes a balance, delivering a range of features and customization options at a competitive price point. The integrated frother is a key differentiator, often absent in comparable models from other manufacturers, enhancing its value proposition.
Where to Find Replacement Parts and Accessories
Genuine Ninja replacement parts and accessories are readily available through several channels. The official Ninja Kitchen website (ninjakitchen.com) is the primary source, offering carafes, filters, and frother attachments. Major retailers like Amazon, Best Buy, and Walmart also stock a wide selection of parts, often with faster shipping options.
For specific components, such as water reservoirs or brew baskets, checking the Ninja website’s parts finder is recommended. Third-party retailers may offer compatible, non-genuine parts at lower prices, but quality can vary. Always verify compatibility before purchasing, and prioritize official Ninja parts for optimal performance and warranty coverage.
Safety Precautions and Warnings
Always exercise caution when operating your Ninja Coffee Maker. Never immerse the appliance in water or any other liquid to prevent electric shock. Ensure the power cord is undamaged and doesn’t contact hot surfaces. Hot surfaces, including the carafe and brew basket, require careful handling to avoid burns – use oven mitts or pot holders.
Do not operate the appliance with a damaged cord or plug. Keep the appliance out of reach of children. Unplug the coffee maker when not in use and before cleaning. Avoid using harsh abrasives or scouring pads, as they can damage the surfaces. Follow all instructions carefully to ensure safe operation.
Warranty Information and Customer Support
Ninja offers a limited warranty on its coffee makers, typically covering one year from the date of purchase against defects in materials and workmanship. Register your product online at the official Ninja Kitchen website to activate your warranty and receive exclusive updates. Proof of purchase is required for all warranty claims.
For customer support, visit the Ninja Kitchen website for FAQs, troubleshooting guides, and downloadable manuals. You can also contact Ninja’s customer service team via phone, email, or live chat. Their dedicated team is available to assist with any questions or concerns regarding your Ninja Coffee Maker. Refer to the warranty documentation for complete details.
Advanced Features: Programmable Settings & Delay Brew
The Ninja Coffee Maker with Frother boasts advanced features enhancing convenience and customization. Utilize the programmable settings to adjust brew strength and temperature to your preference, ensuring a perfect cup every time. The Delay Brew function allows you to schedule brewing up to 24 hours in advance, waking up to freshly brewed coffee.
Explore the settings menu to personalize your coffee experience. Experiment with different combinations to discover your ideal brew. These features provide flexibility for busy schedules and individual tastes. Refer to the control panel guide within this manual for detailed instructions on programming and utilizing these advanced capabilities.