
LiftMaster Professional 1 1/3 HP Manual: A Comprehensive Guide
This manual details installation, operation, troubleshooting, and maintenance for the LiftMaster 1 1/3 HP garage door opener,
emphasizing safety features like LMEP and entrapment protection devices.
The LiftMaster Professional 1 1/3 HP opener represents a robust solution for residential garage door automation. This model is designed for reliable performance and enhanced safety, incorporating features like a standard brake system and a quick-disconnect door arm for emergency manual operation.
It’s crucial to understand that monitored photoelectric sensors and/or door edge sensors are required for momentary contact close modes. Proper installation, as detailed within this manual, is paramount.
The myQ technology seamlessly integrates with Alarm.com, offering smart home connectivity. Professional installation by certified partners across Europe is recommended for optimal functionality and safety.
Safety Precautions and Warnings
Prior to installing or servicing the LiftMaster 1 1/3 HP opener, carefully review all instructions and warnings. Entrapment protection devices, including LiftMaster Monitored Entrapment Protection (LMEP), are critical safety components and must be maintained and tested rigorously. Always disconnect power before performing any maintenance or adjustments.
Use the manual release only in emergencies, verifying proper door reversal function after re-engagement.
Ensure safety reversing sensors are free from obstructions and correctly aligned. Improper installation or adjustments can lead to serious injury or damage – adhere strictly to this manual’s guidance.

Understanding the Components
The LiftMaster 1 1/3 HP system comprises a motor unit, trolley and rail, door arm, and safety sensors, all working in concert for reliable operation.
Trolley and Rail System
The trolley, propelled along the rail, transmits the motor’s power to the garage door. Proper rail alignment is crucial for smooth, quiet operation and prevents binding. The system features a quick disconnect feature, allowing manual door operation during emergencies by releasing the trolley.
If the chain returns to its normal height upon disengagement and the door reverses with a one-inch obstruction, adjustments aren’t needed. Inspect the rail for obstructions or damage, ensuring it’s securely mounted. Maintaining a clean and lubricated rail contributes significantly to the longevity and efficiency of the entire lifting mechanism.
Motor Unit – 1 1/3 HP Specifications
The LiftMaster Professional 1 1/3 HP motor unit delivers robust power for various garage door types. Standard models include a built-in brake for enhanced safety and control. Power requirements should be verified before installation to ensure compatibility with the existing electrical system.
This opener is designed for compatibility with a range of door weights, but exceeding the maximum capacity can compromise performance and safety. Proper installation and adherence to specifications are vital for optimal functionality and to maintain warranty validity.
Door Arm and Connection
The LiftMaster door arm facilitates the transfer of power from the motor unit to the garage door itself. A quick-disconnect feature allows for easy manual operation in emergencies, detaching the trolley when needed. Proper connection and adjustment of the door arm are crucial for smooth and reliable operation.
Ensure the arm is securely fastened and aligned correctly to prevent strain on the motor or door. Incorrect installation can lead to operational issues or safety hazards. Refer to the manual for detailed instructions on connecting and adjusting the door arm for optimal performance.

Installation Procedures
Proper installation involves mounting the motor, assembling the rail system, and carefully connecting/adjusting the door arm for safe and efficient operation.
Mounting the Motor Unit
Securely mounting the motor unit is crucial for stable operation. Begin by identifying suitable mounting locations within your garage, ensuring adequate headroom and accessibility. Utilize appropriate hardware – not included – to firmly attach the unit to ceiling joists or a sturdy support structure.
Verify the mounting surface can support the opener’s weight plus the door’s weight. Proper alignment is essential; ensure the motor unit is positioned correctly relative to the door’s travel path. A quick disconnect door arm facilitates emergency manual operation. Refer to detailed diagrams within the manual for precise mounting instructions and safety precautions during this phase of installation.
Rail Assembly and Alignment
Correct rail assembly and alignment are vital for smooth, reliable door operation. Carefully assemble the rail sections, ensuring all connections are secure and properly tightened. Maintain a level rail throughout its entire length, utilizing shims if necessary to compensate for uneven ceiling surfaces.
Precise alignment is paramount; any deviation can cause binding or operational issues. Double-check that the rail is centered above the door opening and free from obstructions. The trolley must travel freely along the rail without resistance. Refer to the manual’s illustrations for detailed guidance on rail assembly and alignment procedures.
Door Arm Connection and Adjustment
Securely connecting the door arm is crucial for transferring the opener’s power to the garage door. Utilize the quick disconnect feature for emergency manual operation, ensuring a firm lock when engaged. Adjust the arm’s length to achieve proper door travel – typically, a 1-inch board should trigger reversal.
Carefully monitor the door’s movement after connection. Fine-tune adjustments to eliminate binding or uneven lifting. Incorrect arm length can compromise safety features. Refer to the manual’s diagrams for precise positioning and adjustment steps, prioritizing smooth and safe operation.

Operation and Control
This section covers utilizing the wall control, programming remote controls, and integrating myQ technology for convenient and secure garage door management and automation.
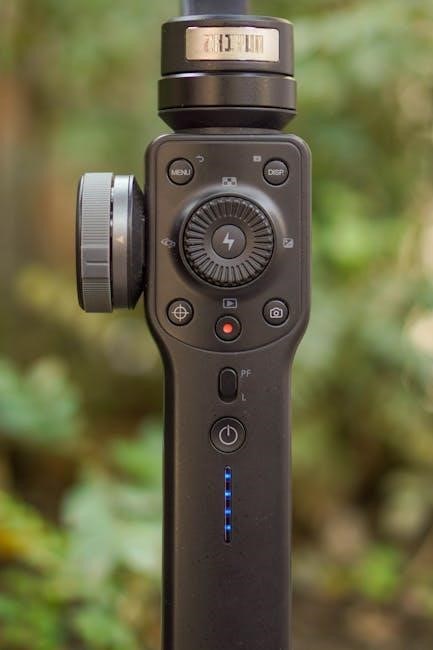
Using the Wall Control
The wall control serves as a primary method for operating your LiftMaster 1 1/3 HP garage door opener. A simple push-button design allows for easy activation. The wall control provides a reliable backup in case of remote control failure or when programming new remotes.
Ensure the wall control is securely mounted and within sight of the garage door.
Functionality includes opening, closing, and stopping the door’s movement.
Pay attention to the indicator lights, which signal door position and potential issues.
Regularly test the wall control to confirm proper operation and responsiveness.
If the wall control becomes unresponsive, consult the troubleshooting section of this manual.
Remote Control Programming
Programming LiftMaster remotes is a straightforward process, enabling convenient garage door control. Begin by locating the “Learn” button on the motor unit – typically orange or yellow. Press and release this button to initiate programming mode. Within 30 seconds, press and hold the desired button on your remote control until the garage door opener light flashes, confirming successful programming.
Repeat this process for each additional remote. If programming fails, ensure the remote has fresh batteries and is within range.
Refer to the specific remote model’s instructions for any unique programming steps. Always test each remote after programming to verify functionality.
myQ Technology Integration
The LiftMaster myQ technology offers seamless smartphone control and monitoring of your garage door. Download the myQ app and create an account to connect your opener. Ensure your opener is myQ-enabled; if not, a myQ bridge may be required for compatibility. Once connected, you can open, close, and check the status of your door remotely.
myQ also provides alerts for door activity and allows for granting access to guests. Integration with Alarm.com further enhances security and automation possibilities. Explore the app’s features for customized settings and enhanced control over your garage access.

Troubleshooting Common Issues
Resolve frequent problems like door reversal issues, safety sensor misalignment, and motor noise by checking connections and adjustments as detailed in this guide.
Door Reversal Problems
If your LiftMaster door reverses unexpectedly, first ensure there are no obstructions in the door’s path. Carefully inspect the safety reversing sensor alignment; remove any debris or realign the receiving eye as instructed on page 23.
A properly functioning system should reverse with just one inch of obstruction. If the chain returns to its normal height when the trolley is disengaged and the door reverses on a one-inch board, no adjustments are needed.
Verify the safety reversing sensor is clean and correctly positioned. Consistent reversal issues may indicate a need for professional service or further troubleshooting within this manual.
Safety Sensor Alignment and Testing
Proper alignment of the photoelectric sensors is crucial for safety. These sensors, required for momentary contact-to-close modes, prevent the door from closing on obstructions; Ensure the sensors are facing each other and the indicator lights are lit steadily.
If the lights blink or are off, realign the sensors. Remove any obstructions blocking the beam. Refer to page 23 for detailed alignment instructions.
Regularly test the sensors by placing a one-inch board in the door’s path while closing; the door should immediately reverse; Misaligned or faulty sensors compromise the LiftMaster’s safety features.
Motor Noise and Performance
Unusual motor noises can indicate several issues. Excessive grinding may suggest worn gears requiring professional attention. Humming without movement could point to a capacitor problem or a stalled motor. Consistent, loud operation, even without issues, warrants inspection.
Reduced lifting power or slow operation may stem from chain tension needing adjustment or insufficient lubrication. Ensure the motor isn’t overloaded by exceeding the maximum door weight capacity.
Regular maintenance, as outlined in this manual, helps maintain optimal motor performance and minimizes noise.

Maintenance and Adjustments
Regular lubrication of moving parts, chain tension checks, and entrapment protection device testing are crucial for ensuring safe and reliable operation of your LiftMaster opener.
Regular Lubrication
Maintaining proper lubrication is essential for smooth and quiet operation of your LiftMaster 1 1/3 HP opener. Periodically lubricate all moving parts, including the chain, trolley, and bearings, using a lithium-based grease. Avoid using WD-40 or similar penetrating oils, as they can attract dust and grime.
Focus on the rail system, applying grease along the entire length. Inspect the chain for wear and tear during lubrication. Proper lubrication reduces friction, extends component life, and minimizes motor strain. Always disconnect power before performing any maintenance. Refer to the manual for specific lubrication points and recommended intervals to ensure optimal performance and longevity of your garage door system.
Chain Tension Adjustment
Proper chain tension is crucial for efficient and reliable operation of your LiftMaster 1 1/3 HP opener. A chain that is too loose can slip or derail, while one that is too tight can strain the motor and components. Inspect the chain regularly for slack.
Adjustment typically involves using the chain adjuster nuts located near the motor. Tighten the nuts to increase tension and loosen them to decrease it. The chain should have minimal slack, approximately ½ inch between the sprockets. Always disconnect power before making adjustments. Ensure the trolley moves freely along the rail after adjustment. Refer to the manual for detailed instructions and diagrams.
Entrapment Protection Device Checks
LiftMaster prioritizes safety with multiple entrapment protection systems. Regularly test the LiftMaster Monitored Entrapment Protection (LMEP), photoelectric sensors, and door edge sensors to ensure proper functionality. Photoelectric sensors should be free of obstructions and aligned correctly – a one-inch board test confirms reversal.
Door edge sensors require a gentle downward pressure test; the door should immediately reverse upon contact. LMEP monitors sensor activity. Never disable or bypass these safety features. Consult the manual for specific testing procedures and troubleshooting steps if issues are detected. Consistent checks are vital for preventing accidents.

Emergency Procedures
In emergencies, utilize the quick-disconnect feature for manual door operation. Understand the trolley disconnect process and brake system for safe control.
Manual Door Release
The LiftMaster Professional 1 1/3 HP opener features a manual release mechanism allowing for door operation during power outages or emergencies. To activate, pull the emergency release cord located on the trolley. This disconnects the trolley from the door, enabling manual movement.
Important: After releasing, test the door’s balance. If the chain returns to its normal height upon disengagement and the door reverses with a one-inch obstruction, no adjustments are needed. Always re-engage the trolley after use to restore automatic operation. Refer to the full manual for detailed instructions and safety precautions regarding the release and re-engagement process.
Disconnecting the Trolley
To disconnect the trolley from the LiftMaster 1 1/3 HP opener, utilize the quick-disconnect door arm feature designed for emergency manual operation. Pulling the release cord effectively separates the trolley, allowing you to move the garage door freely by hand.
Caution: Ensure the door is fully disengaged before attempting manual operation. After disconnecting, verify the door’s balance. Re-engagement is crucial for restoring automated functionality; follow the manual’s instructions carefully. Proper disconnection and reconnection maintain the safety and operational integrity of your LiftMaster system.
Brake System Overview
The LiftMaster Professional 1 1/3 HP opener incorporates a standard brake system on APT, GT, and 3/4-1 HP models, enhancing safety and operational reliability. This brake engages when the door reaches its limits, preventing overtravel and ensuring a secure hold.
Regular inspection of the brake is vital for optimal performance. The system contributes significantly to the entrapment protection features, working in conjunction with sensors. Proper brake function is essential for preventing accidental door closure and maintaining a safe operating environment. Refer to the maintenance section for detailed checks.
Safety Features
LiftMaster prioritizes safety with features like LiftMaster Monitored Entrapment Protection (LMEP), photoelectric sensors, and door edge sensors, crucial for preventing injuries.
LiftMaster Monitored Entrapment Protection (LMEP)
LiftMaster Monitored Entrapment Protection (LMEP) is a critical safety system designed to prevent accidental door closures that could cause injury. This advanced feature continuously monitors the door’s operation and utilizes both monitored photoelectric sensors and/or door edge sensors. Any momentary contact during closing immediately halts and reverses the door.
LMEP ensures that the opener meets stringent safety standards, requiring these sensors for any momentary contact to close modes; Regular testing and proper alignment of these sensors are paramount for optimal performance and reliable protection. The system’s monitoring capabilities provide an added layer of security, alerting users to potential issues.
Photoelectric Sensors
Photoelectric sensors are a vital component of the LiftMaster’s safety system, creating an invisible beam across the garage door opening. If this beam is interrupted by an obstruction – a person, object, or even a pet – the door will immediately stop and reverse to prevent potential harm.
Proper alignment of these sensors is crucial for reliable operation. Obstructions like dirt, cobwebs, or misaligned housings can interfere with the beam. Regularly check the sensors, removing any obstructions and ensuring the sending and receiving eyes are correctly aligned, as detailed on page 23 of the manual.
Door Edge Sensors
Door edge sensors provide an additional layer of safety, working in conjunction with the photoelectric sensors to protect against entrapment. These sensors are typically installed along the bottom edge of the garage door and are designed to detect contact with an object.
Upon contact, the sensors trigger the door to immediately stop and reverse, preventing potential injury or damage. LiftMaster requires monitored photoelectric sensors and/or door edge sensors for any momentary contact-to-close operation modes. Regular testing and maintenance of these sensors are essential for ensuring their proper functionality and maintaining a safe operating environment.
Technical Specifications
This section outlines the LiftMaster 1 1/3 HP opener’s power requirements, door type compatibility, and maximum door weight capacity for optimal performance.
Power Requirements
The LiftMaster Professional 1 1/3 HP garage door opener operates on a standard 120V, 60Hz electrical supply. Proper grounding is crucial for safe operation and to prevent electrical shock. A dedicated 15-amp circuit is recommended to avoid overloading and ensure reliable performance.
Ensure the power outlet is readily accessible and equipped with a Ground Fault Circuit Interrupter (GFCI) for enhanced safety. Verify voltage compatibility before installation. Incorrect voltage can damage the motor unit and void the warranty. Always disconnect power before performing any maintenance or adjustments.
Door Type Compatibility
The LiftMaster Professional 1 1/3 HP opener is designed for compatibility with various garage door types, including sectional doors, single-panel doors, and double-door systems. It effectively handles standard residential garage doors constructed from wood, steel, or aluminum.
However, ensure your door is properly balanced before installation, as the opener isn’t designed to compensate for significant door weight imbalances. Verify the door’s spring system functions correctly. This opener is suitable for doors with a maximum height of 8 feet and a width up to 18 feet.
Maximum Door Weight Capacity
The LiftMaster Professional 1 1/3 HP opener is engineered to handle garage doors within a specific weight range, ensuring safe and reliable operation. This model is capable of lifting doors weighing up to 350 pounds. Exceeding this weight limit can compromise the opener’s performance and potentially cause damage to the motor or door components.
It’s crucial to accurately determine your garage door’s weight before installation. If your door exceeds 350 pounds, a heavier-duty opener is recommended. Proper weight assessment safeguards the system and extends its lifespan.