
Honeywell VisionPro 8000 Thermostat Manual: A Comprehensive Guide
This comprehensive manual details the Honeywell VisionPro 8000 series touchscreen programmable thermostat, covering installation, operation, advanced features, and troubleshooting.
Copyright 2011, Honeywell International Inc. holds all rights; careful handling is crucial, avoiding sharp objects on the touchscreen.
The thermostat utilizes a Lithium battery, potentially containing Perchlorate material, requiring special handling and adherence to safety precautions.
Installation requires a trained technician, and disconnecting power is paramount to prevent electrical shock or equipment damage;
Refer to US Patent No. 6595430 and D5091 for detailed product information and registration details, alongside customer support resources.
The Honeywell VisionPro 8000 is a sophisticated, touchscreen programmable thermostat designed for optimal home comfort and energy efficiency. This thermostat, part of the TH8000 series, offers a user-friendly interface and a wide range of features to customize your heating and cooling schedules.
This manual serves as a complete guide, covering everything from initial installation and setup to advanced programming and troubleshooting. It’s crucial to read and understand these instructions thoroughly before attempting any installation or operation.
The VisionPro 8000 boasts a clear, intuitive touchscreen, eliminating the need for complex button combinations. However, it’s important to note a cautionary measure: avoid using sharp objects like pencils or pens to interact with the screen, as this could cause damage. Always use your fingertip for navigation.
This thermostat is covered by US Patent No. 6595430 and D5091, reflecting Honeywell’s commitment to innovation and quality. Proper installation by a trained technician is highly recommended to ensure optimal performance and safety.
Key Features and Benefits
The Honeywell VisionPro 8000 offers a multitude of features designed to enhance your comfort and control over your home’s climate. Its intuitive touchscreen interface simplifies programming and adjustments, allowing for personalized heating and cooling schedules.
Key benefits include precise temperature control, energy savings through optimized scheduling, and remote access capabilities via Wi-Fi connectivity (when configured). The thermostat supports both conventional and heat pump systems, offering versatility for various home setups.
Advanced features like Auto Override and “Until” temperature settings provide convenient temporary adjustments without disrupting your programmed schedule. Manual fan control allows for customized air circulation.
The VisionPro 8000 also provides valuable insights into your energy usage and system performance. Its compatibility with Equipment Interface Modules expands its functionality, while error codes assist in quick troubleshooting. Ultimately, this thermostat delivers a blend of convenience, efficiency, and control.
Safety Precautions
Prior to installation or servicing the Honeywell VisionPro 8000, always disconnect power at the breaker or fuse box to prevent electrical shock or damage to equipment. This is a critical safety measure.
Installation should be performed by a trained and experienced technician familiar with HVAC systems and electrical wiring. Improper installation can lead to hazardous conditions.
Exercise caution when handling the thermostat, avoiding the use of sharp objects like pencils or pens on the touchscreen to prevent damage.
The thermostat contains a Lithium battery that may include Perchlorate material, requiring careful handling and disposal according to local regulations. Do not incinerate.
Always read and follow these instructions carefully to ensure safe and proper operation. Failure to adhere to these precautions could result in product damage, personal injury, or system malfunction.

Installation Guide
Proper installation of the VisionPro 8000 requires disconnecting power first, and a trained technician is essential for safe and effective setup.
Disconnecting Power Before Installation
Crucially, before commencing any installation procedures for your Honeywell VisionPro 8000 thermostat, absolutely disconnect the power supply to the heating and cooling system. This vital safety precaution prevents potential electrical shock and safeguards both yourself and the equipment. Locate the circuit breaker or fuse that controls the HVAC system and switch it to the ‘off’ position.
Verify the power is completely off by testing the wires at the thermostat location with a non-contact voltage tester. Double-check to ensure no voltage is present before proceeding with any wiring connections; Failure to disconnect power can result in serious injury or damage to the thermostat and associated system components.
Remember, the relay outputs and inputs on the thermostat will not function correctly if power isn’t properly disconnected during installation. Always prioritize safety and follow these instructions carefully.
Wiring Diagrams (General)
The Honeywell VisionPro 8000 thermostat utilizes a standard wiring configuration, though specific connections vary based on your system type. Generally, terminals are designated for Rh (heating power), Rc (cooling power), W (heat), Y (cool), G (fan), and C (common).
Carefully consult the wiring diagram included with your specific thermostat model and compare it to your existing wiring. Incorrect wiring can damage the thermostat or your HVAC system. Ensure wires are securely connected to the appropriate terminals, avoiding loose connections.
If using an Equipment Interface Module, note that the relay outputs and inputs on the thermostat may not function as expected. Always refer to the module’s documentation for proper wiring instructions. A trained, experienced technician should perform the wiring to ensure safety and correct operation.
Wiring for Heat Pump Systems
Wiring the Honeywell VisionPro 8000 for a heat pump system requires careful attention to terminal designations. Typically, you’ll utilize Rh, Rc, Y, G, W, and C terminals, but additional connections may be needed for auxiliary heat or reversing valve control.
The ‘O’ or ‘B’ terminal controls the reversing valve, switching between heating and cooling modes. Proper identification of this wire is crucial for correct operation. Auxiliary heat wiring often connects to the ‘Aux’ or ‘E’ terminal, providing supplemental heating during colder temperatures.
Always consult the specific wiring diagram for your heat pump model and the VisionPro 8000 thermostat. Incorrect wiring can lead to inefficient operation or damage to the system. A qualified HVAC technician is recommended for installation to ensure safety and compliance with local codes.
Wiring for Conventional Systems
For conventional heating and cooling systems, the Honeywell VisionPro 8000 typically utilizes Rh, Rc, Y, G, and W terminals. Rh connects to the heating power source, while Rc connects to the cooling power source. The ‘Y’ terminal controls the compressor, ‘G’ activates the fan, and ‘W’ energizes the heating system.
A common wire (C) is often required to provide continuous power to the thermostat, especially for advanced features like Wi-Fi connectivity. If a C-wire isn’t present, an adapter may be necessary.
Ensure proper voltage levels and wire gauge compatibility with the thermostat and HVAC equipment. Disconnect power before installation to avoid electrical shock. Refer to the detailed wiring diagram included with the thermostat and your specific HVAC system for accurate connections. A qualified technician is recommended for installation.
Equipment Interface Module Compatibility
The Honeywell VisionPro 8000 thermostat’s functionality is affected when used with an Equipment Interface Module (EIM). Specifically, the relay outputs and inputs on the thermostat do not function when an EIM is connected. This means certain advanced control features might be limited or unavailable.
EIMs are often used to bridge compatibility between the thermostat and more complex or proprietary HVAC systems. They translate signals, allowing the thermostat to communicate effectively.
Carefully review the EIM’s documentation to understand its specific impact on the VisionPro 8000’s features. Proper wiring and configuration are crucial for correct operation. Consult a qualified HVAC technician for assistance with EIM integration and troubleshooting.
Thermostat Operation
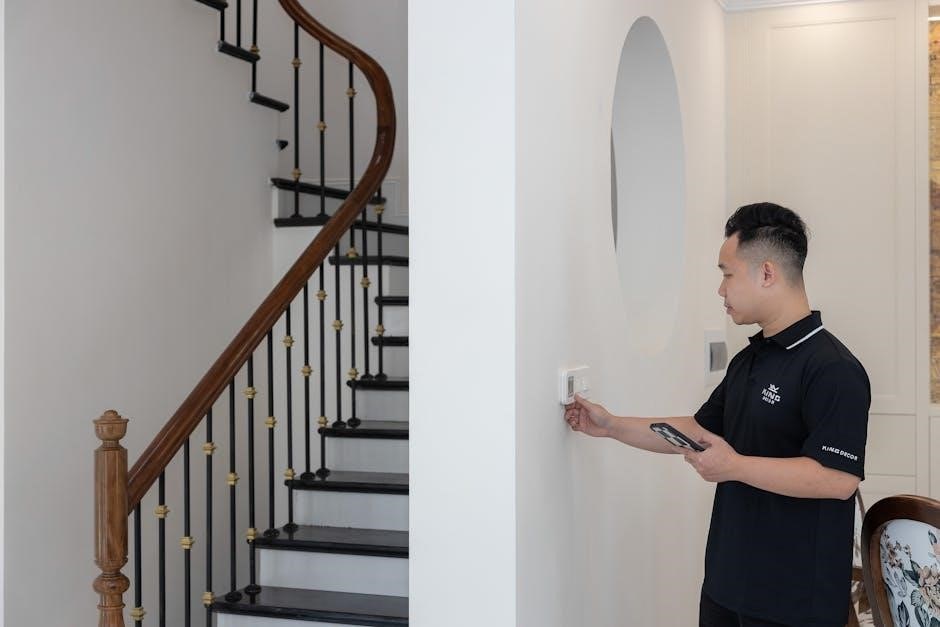
The VisionPro 8000 features an intuitive touchscreen interface for easy control of your home’s heating and cooling. Navigate menus to adjust settings,
program schedules, and monitor current conditions.
Navigating the Touchscreen Interface
The VisionPro 8000’s touchscreen is the primary method for controlling your thermostat. Avoid using sharp objects like pencils or pens; always use your fingertip to prevent damage. The interface is designed for intuitive operation, allowing you to easily access various functions and settings.
Key areas include the main display, which shows current temperature and system status, and the menu options, accessed by touching the screen. Underlined labels guide you through the system. Use the arrow keys to scroll through options and the ‘Done’ key to confirm selections.
Familiarize yourself with the icons representing different modes (Heat, Cool, Auto, Off) and features. The thermostat responds quickly to touch, providing a seamless user experience. Explore the menus to discover all the customizable options available, tailoring the system to your specific needs and preferences. Remember to save any changes made.
Understanding the Main Display
The VisionPro 8000’s main display provides at-a-glance information about your home’s climate control. You’ll see the current room temperature prominently displayed, alongside the setpoint temperature – the temperature the thermostat is working to achieve.
The display also indicates the current system mode (Heat, Cool, Auto, or Off) and the fan setting (Auto or On). A clock icon shows the current time and date, which can be adjusted through the settings menu.
Status icons alert you to important information, such as when the system is actively heating or cooling, or if there’s a system fault. The current display is easily readable, offering a clear overview of your system’s operation. Understanding these elements allows for quick assessment and adjustments as needed, ensuring optimal comfort and efficiency.
Setting the Current Time and Date
Accurate time and date settings are crucial for proper scheduling and operation of your VisionPro 8000 thermostat. To set these, begin by pressing the “Clock” key on the touchscreen interface. This will access the time and date adjustment screen.
Use the arrow keys to navigate and adjust the hour and minute. Ensure you correctly set the AM or PM designation. Next, navigate to the date setting using the arrow keys, and adjust the month, day, and year accordingly.
Once the correct time and date are displayed, press the “Done” key to save your changes. The thermostat will then operate based on the newly configured time and date, ensuring accurate scheduling and functionality. Regularly verifying these settings is recommended.
Programming Schedules

The VisionPro 8000 allows for customized heating and cooling schedules to optimize comfort and energy savings. Access the scheduling function through the main menu on the touchscreen interface. You can create different schedules for weekdays and weekends, or even individual days.
Each schedule consists of multiple periods – typically Wake, Leave, Return, and Sleep. For each period, you can set a desired temperature. Use the arrow keys to adjust the time and temperature for each period. The thermostat supports multiple temperature changes throughout the day.
Carefully consider your daily routine when programming schedules. Ensure the set temperatures align with your comfort preferences and energy-saving goals. Save your schedule after making changes, and review it periodically to ensure it remains effective.
Temperature Hold Options (Permanent, Vacation)
The VisionPro 8000 offers flexible temperature hold options to override programmed schedules when needed. The “Permanent Hold” maintains a single, constant temperature indefinitely, ignoring the scheduled program until manually changed. This is ideal for extended periods requiring a consistent temperature.
The “Vacation Hold” is designed for longer absences. You set a desired temperature and a start/end date; the thermostat will maintain this temperature until the specified return date, then automatically resume the programmed schedule. This minimizes energy usage while you’re away.
To activate either hold, navigate to the main menu and select the desired option. Carefully input the temperature and, for Vacation Hold, the dates. Remember to cancel the hold when you want to return to the programmed schedule, ensuring optimal comfort and efficiency.
Advanced Features
The VisionPro 8000 boasts auto override, manual fan control, and the “Until” temperature setting, alongside convenient Wi-Fi connectivity for remote access and control.
Manual Override of Fan Schedule
The Honeywell VisionPro 8000 allows for manual override of the programmed fan schedule, providing immediate control over airflow regardless of the set schedule. This feature is accessed through the touchscreen interface, offering flexibility to adjust comfort levels as needed. To initiate a manual override, navigate to the fan control options within the thermostat’s menu.
Users can select from options like “On” to continuously run the fan, or “Auto” to revert to the programmed schedule. Table 8, referenced in the operating manual, details the specific operational steps for this function. The override remains active until manually changed or the thermostat is reset.
This functionality is particularly useful for improving air circulation, managing humidity, or simply providing a more personalized comfort experience. Remember that the relay outputs and inputs may not function when using an Equipment Interface Module.
Auto Override Functionality
The Honeywell VisionPro 8000’s Auto Override feature temporarily adjusts the programmed temperature settings without disrupting the overall schedule. This is ideal for short-term comfort adjustments, like accommodating unexpected guests or responding to immediate temperature changes. Activation is straightforward, typically initiated through the touchscreen interface by selecting the “Auto Override” option.
Once engaged, the thermostat will maintain the new temperature for a specified duration, after which it automatically reverts to the original programmed schedule. The manual indicates that Auto Override resumes the Fan Program in each schedule.

This function provides a convenient balance between personalized control and energy efficiency, avoiding the need to reprogram the entire schedule for temporary adjustments. It’s a key component of the thermostat’s user-friendly design, enhancing comfort and convenience.
Using the “Until” Temperature Setting
The “Until” temperature setting on the Honeywell VisionPro 8000 offers a flexible way to maintain a specific temperature until a designated time. This feature surpasses a simple temperature hold, allowing for precise control over heating or cooling duration. Accessed through the touchscreen interface, users can input both the desired temperature and the time at which the system should revert to its programmed schedule.
Unlike a permanent hold, the “Until” setting automatically cancels itself, eliminating the need for manual intervention. This is particularly useful for events with a defined end time, such as a party or a period of increased activity.
The manual highlights its use alongside Permanent Hold and Vacation Hold options, providing a tiered system for temperature management. It’s a powerful tool for optimizing comfort and energy usage.
Wi-Fi Connectivity and Setup
The Honeywell VisionPro 8000 thermostat boasts integrated Wi-Fi capabilities, enabling remote control and monitoring via compatible devices. Setting up this connectivity requires accessing the thermostat’s settings menu through the touchscreen interface. The process involves selecting the Wi-Fi option and scanning for available networks.
Once a network is selected, users will be prompted to enter the network password. Successful connection allows for control via the Honeywell Home app, offering features like schedule adjustments, temperature monitoring, and alerts.
The manual emphasizes the benefits of remote access, providing convenience and potential energy savings. Troubleshooting steps are available within the app and the full manual for connection issues.

Troubleshooting
This section details common error codes, battery replacement procedures (including Perchlorate handling), factory reset instructions, and solutions for display issues.
Common Error Codes
The Honeywell VisionPro 8000 thermostat utilizes a series of error codes to diagnose potential issues. Understanding these codes is crucial for effective troubleshooting. While a complete list is extensive, some frequently encountered codes include those related to sensor failures, communication errors with the equipment interface module, and power supply problems.
For example, a sensor error might indicate a faulty temperature probe, requiring replacement. Communication errors often suggest wiring issues or incompatibility with the connected HVAC system. Power-related codes could point to a low battery, a tripped circuit breaker, or a faulty transformer.
Consult the full error code list within the thermostat’s manual or Honeywell’s online support resources for specific details on each code and recommended corrective actions. Ignoring error codes can lead to continued malfunction or even damage to the HVAC system. Always prioritize safety and consult a qualified technician if unsure.
Battery Replacement (Lithium Battery & Perchlorate Handling)
The Honeywell VisionPro 8000 thermostat utilizes a lithium battery to retain programmed settings during power outages. Replacement is necessary when the low battery icon appears on the display or if the thermostat fails to maintain settings. Caution: This battery may contain perchlorate material, requiring careful handling and disposal.
Always power off the thermostat before attempting battery replacement. Refer to the manual for specific instructions on accessing the battery compartment. Dispose of the old battery properly, following local regulations for perchlorate waste. Do not incinerate or puncture the battery.
Use only a compatible lithium battery as specified in the manual. Incorrect battery types can damage the thermostat or pose a safety hazard. Proper disposal ensures environmental responsibility and prevents potential contamination.
Resetting the Thermostat to Factory Defaults
Resetting your Honeywell VisionPro 8000 thermostat to factory defaults will erase all personalized settings, including programmed schedules, temperature preferences, and Wi-Fi configurations. This is useful for troubleshooting or preparing the thermostat for a new user.
To initiate a factory reset, navigate through the touchscreen interface to the settings menu. The exact path may vary slightly depending on the software version, but generally involves accessing the “Reset” or “Factory Defaults” option. Confirm your decision as this action is irreversible without manual reprogramming.
Be aware that resetting will return the thermostat to its original, out-of-the-box state. You will need to re-establish your Wi-Fi connection and completely reprogram your desired heating and cooling schedules. Consult the manual for detailed step-by-step instructions.
Addressing Display Issues
If you encounter display problems with your Honeywell VisionPro 8000 thermostat, several troubleshooting steps can be taken before assuming a hardware failure. First, ensure the thermostat is receiving adequate power; a low battery can cause dimming or flickering. Replace the lithium battery as needed, following proper Perchlorate material handling guidelines.
If the display is completely blank, verify the power supply and wiring connections. Try resetting the thermostat – this can sometimes resolve software glitches affecting the display. Gently clean the touchscreen with a soft, dry cloth to remove any dust or smudges that might be obstructing visibility.
For persistent issues, consult the troubleshooting section of the full operating manual or contact Honeywell Customer Care for further assistance. Avoid using sharp objects to interact with the touchscreen, as this can cause permanent damage.
Technical Specifications
The VisionPro 8000 series is covered by US Patent No. 6595430 and D5091; model numbers determine compatibility.
It’s a U.S. Registered Trademark of Honeywell International Inc. from 2004, offering advanced control features.
Model Numbers and Compatibility
Understanding the specific model number of your Honeywell VisionPro 8000 thermostat is crucial for ensuring compatibility with your existing HVAC system and accessories. The TH8000 series encompasses various configurations, each designed to accommodate different heating and cooling setups.
Compatibility extends to the Equipment Interface Module (EIM), which facilitates communication between the thermostat and the HVAC equipment. Not all EIMs are universally compatible; therefore, verifying the correct EIM model is essential for proper functionality.
The thermostat’s wiring diagrams, detailed in the installation guide, illustrate the connections required for heat pump and conventional systems. Confirming that your system’s wiring aligns with these diagrams is vital before proceeding with installation.
Referencing the product data sheet and Honeywell’s online resources will provide a comprehensive list of compatible systems and accessories. Incorrect model pairings can lead to operational issues or damage to the equipment.
Patent Information (US Patent No. 6595430, D5091)
Honeywell International Inc. has secured patent protection for the innovative technologies incorporated into the VisionPro 8000 thermostat. US Patent No. 6595430 covers key aspects of the thermostat’s functionality and design, safeguarding Honeywell’s intellectual property.
Design Patent D5091 further protects the unique aesthetic elements of the VisionPro 8000, including its touchscreen interface and overall physical appearance. These patents demonstrate Honeywell’s commitment to innovation and product development in the home comfort sector.
This patent information is provided for informational purposes only and does not grant any license or right to use the patented technologies without express written permission from Honeywell.
Unauthorized reproduction, modification, or distribution of the patented technologies is strictly prohibited and may result in legal action. Refer to Honeywell’s legal department for any inquiries regarding patent licensing or usage rights.
Customer Support and Registration
For assistance with your Honeywell VisionPro 8000 thermostat, a dedicated customer support team is readily available to address your questions and concerns. You can reach them through various channels, including phone support and online resources.
Registering your thermostat provides access to exclusive benefits, such as extended warranty options, product updates, and personalized support. Registration also allows Honeywell to better understand customer needs and improve future products.
Visit the Honeywell Home website to register your thermostat and explore a comprehensive library of support materials, including FAQs, troubleshooting guides, and instructional videos.
Prompt and efficient support is a priority, ensuring a seamless experience with your VisionPro 8000 thermostat. Contact information and registration details are readily available within this manual and on the Honeywell Home website.