Butterball XL Indoor Turkey Fryer Manual: A Comprehensive Guide
This manual details the Butterball XL Indoor Electric Turkey Fryer’s operation, safety, and maintenance․ It covers assembly, preparation, frying, and troubleshooting for optimal results․
The Butterball XL Indoor Electric Turkey Fryer offers a safe and convenient alternative to traditional outdoor frying․ This appliance allows you to enjoy a perfectly cooked turkey year-round, regardless of weather conditions․ Designed for indoor use, it minimizes risks associated with open flames and outdoor elements․
Featuring stainless steel construction and a space-saving design, the XL fryer utilizes significantly less oil than standard fryers․ Masterbuilt provides helpful resources, including instructional videos, accessible via their website, to guide users through the process․ This fryer is ideal for both novice and experienced cooks․
Understanding the Key Features
The Butterball XL boasts a generous capacity, accommodating turkeys up to 20 pounds․ Its patented drain clips simplify oil disposal, while the included cooking basket ensures safe lowering and raising of the bird․ The fryer’s intelligent design minimizes oil usage – requiring only 2 gallons – compared to conventional methods․

A key feature is the indoor operation, eliminating outdoor frying hazards․ The unit includes a control panel with precise temperature and timer settings․ Stainless steel construction guarantees durability, and versatility extends beyond turkey to frying, boiling, and steaming․
Safety Precautions & Warnings
Always ensure the heating element is fully submerged in oil before operation; it only heats when properly immersed․ Never operate the fryer without oil․ Use extreme caution when handling hot oil and the hot turkey․ Keep children and pets away during operation․
Avoid contact with the exterior surfaces during and immediately after use, as they become very hot․ Ensure the fryer is placed on a stable, heat-resistant surface․ Do not overfill with oil; adhere to the 2-gallon maximum capacity․
Electrical Safety Guidelines
Plug the fryer into a grounded outlet only․ Never use an extension cord․ Ensure the voltage matches the fryer’s specifications․ Do not operate with a damaged cord or plug․ Disconnect the fryer from the power source before cleaning or when not in use․
Avoid operating the fryer outdoors or in damp environments․ Never immerse the fryer base, cord, or plug in water․ If the fryer malfunctions, unplug it immediately and contact customer support․
Oil Safety & Handling
Use only cooking oils with a high smoke point, like peanut oil․ Never overfill the fryer beyond the maximum fill line – 2 gallons is crucial․ Heat oil slowly and monitor the temperature carefully․ Avoid splashing or spilling hot oil, as it can cause severe burns․
Never leave hot oil unattended․ Allow the oil to cool completely before draining or disposing of it properly․ Dispose of used oil responsibly, following local regulations․
Unboxing and Assembly
Carefully unpack all components, verifying against the component checklist․ The fryer base, cooking basket, lid, and drain clips should be present․ Assemble the fryer by securely attaching the handles and ensuring all parts are firmly connected․
Proper assembly is vital for safe operation․ Refer to the step-by-step instructions for correct placement of each component․ Ensure the drain clips are correctly installed before adding oil․ Watch the instructional video on masterbuilt․com for guidance․
Component Checklist
Before assembly, confirm all parts are included․ This checklist ensures a complete setup: Fryer base, stainless steel cooking pot, lid with viewing window, cooking basket, and drain clips are essential․ Verify the presence of the power cord and user manual․
Inspect each component for damage․ Missing or damaged parts should be reported immediately․ The basket rests within the fryer, and patented drain clips facilitate easy oil disposal․ Ensure all items match the manual’s illustrations․
Step-by-Step Assembly Instructions
Begin by placing the fryer base on a stable, level surface․ Carefully insert the stainless steel cooking pot into the base, ensuring it sits securely․ Attach the lid, aligning the hinges correctly․ Next, position the cooking basket inside the pot, ready for the turkey․
Secure the drain clips to the pot’s rim for controlled oil drainage․ Finally, connect the power cord to the fryer․ Refer to the manual’s diagrams for visual guidance throughout this process․
Operating Instructions
Before first use, ensure the fryer is clean and all components are properly assembled․ Plug the power cord into a grounded outlet․ The heating element activates only when the lid is securely closed – a crucial safety feature․ Use the control panel to set the desired temperature and timer․
Always monitor the fryer during operation․ Never leave it unattended․ Refer to the manual for specific temperature and time guidelines based on your turkey’s weight․
Powering On and Initial Setup

Before initial use, verify the fryer is on a stable, heat-resistant surface․ Ensure the unit is unplugged․ Carefully inspect the power cord for any damage․ Plug the fryer into a dedicated, grounded 120V outlet․ The control panel will illuminate, indicating power․
Perform a test run with water to confirm the heating element functions correctly, following the manual’s instructions․ Never operate without oil once ready for frying․
Setting Temperature and Timer
To set the temperature, press the “Temperature” button and use the “+” and “-” buttons to select the desired cooking temperature․ The display will show your chosen setting․ For the timer, press the “Timer” button and adjust the cooking duration similarly․
Refer to the cooking times chart for recommended settings based on turkey weight․ The fryer will automatically maintain the set temperature throughout the process․
Turkey Preparation
Proper turkey preparation is crucial for safe and delicious results․ Ensure the turkey is completely thawed before frying; allow ample time based on weight․ Brining or seasoning the turkey enhances flavor and moisture․ Pat the turkey dry inside and out to minimize splattering․
Remove giblets and neck from the cavity․ Do not overfill the fryer; a maximum of 20 pounds is recommended for the XL model․
Thawing the Turkey
Complete thawing is paramount for safety and even cooking․ The recommended method is refrigerator thawing, allowing approximately 24 hours for every 4-5 pounds of turkey․ Submerging in cold water, changing it every 30 minutes, is a faster option․ Never thaw at room temperature․
Ensure no ice crystals remain inside the cavity before frying․ A fully thawed turkey will cook more evenly and reduce the risk of oil splattering․
Brining and Seasoning Recommendations
Brining enhances flavor and moisture retention during frying․ A basic brine consists of water, salt, and sugar, with optional herbs and spices․ Submerge the thawed turkey in the brine for 12-24 hours in a food-safe container, refrigerated․
Pat the turkey completely dry before seasoning․ Simple seasoning with salt, pepper, and your favorite herbs is sufficient; avoid sugary rubs that can burn․
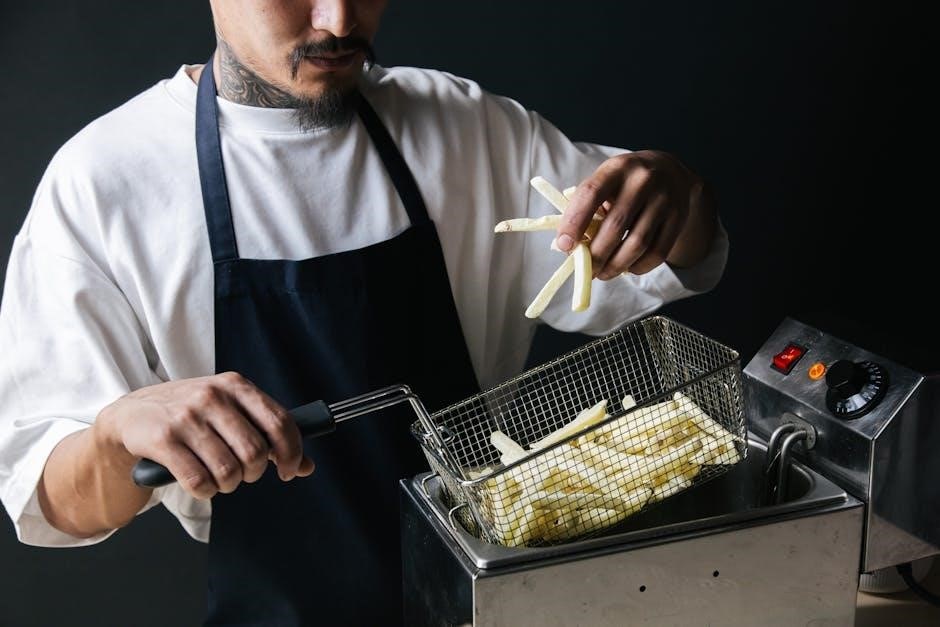
Frying Process

Ensure the turkey is fully thawed and patted dry before beginning․ Carefully lower the turkey into the fryer using the included hook, slowly and steadily․ Monitor the oil level; it should cover the turkey completely, but not exceed the maximum fill line․
Avoid splashing oil during lowering․ Once submerged, maintain the set temperature and frying time as per the cooking chart․
Oil Level and Capacity (2 Gallons)
The Butterball XL fryer requires precisely 2 gallons of oil for safe and effective operation․ Exceeding this capacity poses a significant overflow risk during turkey submersion․ Always verify the oil level before each use, ensuring it fully covers the turkey without reaching the maximum fill line․
Peanut oil is recommended due to its high smoke point․ Use the fryer’s markings as a guide, and never operate with less than the specified amount․
Lowering and Raising the Turkey
Slowly and carefully lower the completely thawed and dry turkey into the hot oil using the provided lifting hook․ Lower it gradually to prevent oil splattering and potential burns․ Monitor closely during descent․
Once cooked, raise the turkey slowly and steadily, allowing excess oil to drain back into the fryer․ Exercise extreme caution, as the turkey and oil will be extremely hot․ Use oven mitts and a stable surface․
Cooking Times & Temperatures
Generally, calculate approximately 3-4 minutes per pound for frying a turkey in this fryer․ Always verify internal temperature with a meat thermometer․ Recommended oil temperature is 350°F (177°C) throughout the cooking process․
For a 12-pound turkey, expect around 36-48 minutes․ Larger turkeys require proportionally longer cooking times․ Ensure the internal temperature reaches 165°F (74°C) in the thickest part of the thigh․
Recommended Times for Different Turkey Sizes
For a 10-12 pound turkey, plan for 36-48 minutes of frying time․ A 14-16 pound turkey typically requires 42-64 minutes․ Larger birds, 18-20 pounds, may take 54-80 minutes․
These are estimates; always prioritize internal temperature․ Remember to account for oil temperature fluctuations․ Consistent monitoring is crucial for safe and delicious results․ Always use a reliable meat thermometer to confirm doneness at 165°F (74°C)․
Internal Temperature Monitoring
Accurate internal temperature is vital for safe turkey consumption․ Insert a meat thermometer into the thickest part of the thigh, avoiding the bone․ The turkey is fully cooked when it reaches 165°F (74°C)․
Check multiple spots to ensure even cooking․ Consistent monitoring prevents undercooking and potential foodborne illness․ Never rely solely on frying time; temperature is the definitive indicator of doneness․ A digital thermometer provides the most precise readings․
Cleaning and Maintenance
Proper cleaning extends the fryer’s lifespan and ensures food safety․ Always unplug and cool the unit completely before cleaning․ Carefully dispose of used oil responsibly – do not pour it down the drain․
Detach and wash the pot, basket, and other removable parts with warm, soapy water․ Wipe the exterior with a damp cloth․ Ensure all components are thoroughly dry before reassembling․ Regular maintenance prevents buildup and maintains optimal performance․
Disposing of Used Oil
Used cooking oil requires careful disposal to protect the environment․ Never pour it down drains, as it can cause significant plumbing issues and harm wastewater systems․ Allow the oil to cool completely before handling․

Pour the cooled oil into a sealed container, such as the original oil bottle or a disposable container with a lid․ Check with your local waste management services for designated oil recycling or disposal locations․
Cleaning the Fryer Components
Always unplug the fryer and allow it to cool completely before cleaning․ Remove the cooking basket, pot, and any other detachable parts․ Wash these components with warm, soapy water, ensuring all oil residue is removed․ Avoid abrasive cleaners that could damage the surfaces․
Wipe down the exterior of the fryer with a damp cloth․ Never immerse the electrical base in water․ Ensure all parts are thoroughly dry before reassembling and storing the fryer․
Troubleshooting Common Issues
If the fryer isn’t heating, verify the power cord is securely plugged in and the outlet is functioning․ Check the control panel settings to ensure it’s set to the desired temperature․ For temperature control problems, confirm the thermostat is properly calibrated․
If issues persist, consult the full manual or Masterbuilt’s website for further assistance․ Never attempt to repair the fryer yourself; contact qualified service personnel․
Fryer Not Heating
If your Butterball XL fryer isn’t heating, first ensure the power cord is firmly connected to a working electrical outlet․ Verify the control panel is powered on and a temperature is selected․ The heating element only activates when properly assembled and filled with oil․
Double-check the safety features are engaged correctly․ If the problem continues, consult the manual or Masterbuilt’s support resources for detailed troubleshooting steps․
Temperature Control Problems
If the Butterball XL fryer’s temperature fluctuates or doesn’t maintain the set point, verify the control panel settings are accurate․ Ensure the fryer is indoors, away from drafts, which can affect temperature stability․ Confirm the turkey isn’t excessively cold, as this impacts oil temperature recovery․

If issues persist, review the manual for calibration instructions or contact Masterbuilt support for assistance․ Consistent temperature is crucial for safe and even cooking․
Understanding the Control Panel
The Butterball XL’s control panel features a digital display for precise temperature and timer settings․ Indicators show power status and heating element activation․ Use the intuitive buttons to adjust cooking parameters․ The panel ensures consistent temperature control for optimal frying․
Refer to the manual for detailed explanations of each function․ Familiarizing yourself with the control panel is key to safe and successful turkey frying․
Display Indicators and Functions
The display shows set and actual temperatures, alongside the remaining cooking time․ A power indicator confirms the unit is plugged in․ The heating element indicator illuminates when actively heating oil․ Error codes, if any, will appear on the display, referencing the troubleshooting section․
Buttons control temperature adjustments, timer settings, and power on/off․ Precise monitoring ensures a perfectly cooked turkey․ Consult the manual for specific code definitions․
Accessories and Replacement Parts
Essential accessories include the cooking basket, drain clips, and a lid for storage․ Replacement parts, such as the heating element, control panel, and temperature probe, are available through Masterbuilt’s website or authorized retailers․ Ensure compatibility with your specific model number (e․g․, ETF3A)․
Regularly inspect components for wear and tear․ Maintaining genuine Butterball parts guarantees safety and optimal performance․ Contact customer support for assistance locating specific replacements․
Frequently Asked Questions (FAQ)
Q: Can I use oil other than peanut oil? A: While peanut oil is recommended, other high smoke-point oils can be used with caution․ Q: How do I clean the fryer? A: Unplug, cool, and wipe down components; avoid submerging the base․
Q: What if the fryer won’t heat? A: Check the power cord and ensure proper assembly․ Q: Where can I find the PDF manual? A: Download from Masterbuilt’s website or retailer sites․
Warranty Information
Butterball’s XL Indoor Electric Turkey Fryer is warranted against defects in materials and workmanship․ This warranty covers one year from the original purchase date․ It does not cover damage from misuse, accidents, or unauthorized repairs․
To make a claim, contact Masterbuilt Products with proof of purchase․ Modifications void the warranty․ See the full warranty details within the included documentation or on the Masterbuilt website for complete terms and conditions․
PDF Manual Download Locations
Locate the Butterball XL Indoor Electric Turkey Fryer’s PDF manual online for convenient access․ Several websites host the document, including Masterbuilt’s official site (www․masterbuilt․com)․ You can also find it through online searches using the model number (e․g․, ETF3A)․
ManualsLib and other document-sharing platforms often provide downloadable versions․ Ensure the PDF is the correct model to avoid inaccurate instructions․ Having a digital copy readily available simplifies operation and troubleshooting․
Masterbuilt Website Resources
Masterbuilt․com offers extensive resources for Butterball XL Indoor Electric Turkey Fryer owners․ Explore their support section for frequently asked questions, troubleshooting guides, and additional safety information․ Watch the “Getting to know your XL Butterball Indoor Electric Turkey Fryer” video for a visual walkthrough of the appliance’s features․
The website also provides access to replacement parts and accessories․ Registering your fryer unlocks exclusive content and support․ Masterbuilt’s online resources ensure a seamless frying experience․
Oil Recommendations (Peanut Oil)
Peanut oil is the recommended oil for the Butterball XL Indoor Electric Turkey Fryer due to its high smoke point and neutral flavor, ensuring a crispy, delicious turkey․ Only use 2 gallons of oil; exceeding this capacity is dangerous․ Other oils may be used, but peanut oil consistently delivers superior frying results․
Always ensure the oil is fresh and clean before each use․ Properly disposing of used oil is crucial for environmental safety․ Refer to the cleaning and maintenance section for disposal guidelines․

Additional Safety Features
The Butterball XL Indoor Electric Turkey Fryer incorporates several safety mechanisms․ The heating element activates only when the unit is properly assembled, preventing accidental operation․ A third less oil is used compared to standard fryers, reducing potential hazards․ Patented drain clips simplify oil disposal, minimizing spills and burns․
Always supervise the fryer during operation and ensure it’s placed on a stable, heat-resistant surface․ Never leave the fryer unattended while heating or frying․ Review all safety precautions before each use․