Brother Project Runway Sewing Machine Manual: A Comprehensive Guide
This manual provides detailed instructions for setting up, operating, and maintaining your Brother Project Runway sewing machine, ensuring optimal performance and longevity for all your creative projects․
The Brother Project Runway series represents a collaboration blending innovative sewing technology with the stylish aesthetic of the popular fashion design competition․ These machines are specifically designed to empower both aspiring and experienced sewists, offering a range of features catering to diverse project needs․ From beginner-friendly models to advanced machines equipped with extensive stitch options and connectivity, the line aims to inspire creativity and streamline the sewing process․
Brother understands the importance of reliable performance and user-friendly operation․ Consequently, the Project Runway machines incorporate intuitive controls, clear displays, and robust construction․ They are built to handle various fabrics and techniques, supporting everything from simple alterations to complex garment construction․ Furthermore, Brother provides comprehensive support resources, including this manual, to ensure a seamless sewing experience․
Understanding Your Sewing Machine Model
Before beginning, it’s crucial to identify your specific Brother Project Runway model․ Each machine within the series possesses unique capabilities and features․ Locate the model number, typically found on a sticker on the machine’s body, often at the rear or underside․ Refer to this number throughout this manual to ensure you’re following the correct instructions for your particular machine․
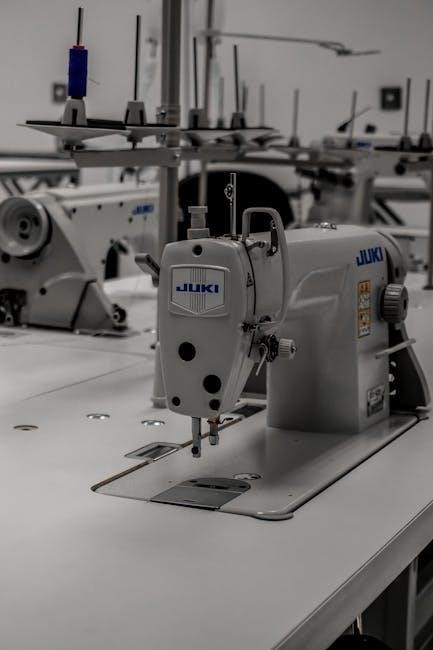
Familiarize yourself with the machine’s key components: the power switch, foot pedal, bobbin winder, thread tension dial, stitch selection dial, and needle plate․ Understanding the function of each part will greatly enhance your sewing experience․ This manual provides diagrams illustrating these components and their locations․ Remember, proper identification and understanding are foundational to successful operation and maintenance․
Key Features of the Brother Project Runway Series
The Brother Project Runway series is renowned for its blend of user-friendly design and advanced functionality․ These machines often include a wide array of built-in stitch patterns, catering to diverse sewing needs – from basic garment construction to intricate quilting and decorative embellishments; Many models boast an automatic needle threader, simplifying a traditionally tedious task․
Furthermore, features like adjustable sewing speed and a needle up/down function provide enhanced control and precision․ Wireless connectivity, available on select models, enables seamless integration with mobile devices for expanded creative possibilities․ Brother prioritizes reliability, designing these machines to operate at pre-set temperatures, ensuring consistent performance․ Genuine Brother supplies are recommended for optimal results․
Setting Up Your Machine
Proper setup is crucial for optimal performance․ This section details unboxing, connecting power, winding the bobbin, and correctly threading both upper and lower threads․
Unboxing and Initial Inspection
Carefully unpack your Brother Project Runway sewing machine, ensuring all components are present․ Verify the box contains the machine itself, the power cord, the foot pedal, various presser feet, bobbins, needle sets, a screwdriver, a cleaning brush, and this operation manual․
Inspect the machine for any visible damage incurred during shipping․ Check for dents, scratches, or broken parts․ If damage is detected, immediately contact the retailer or Brother customer support․ Retain all packaging materials for potential returns or claims․ Confirm the machine’s model number matches the information on the box and in the manual․ Familiarize yourself with the location of key components like the bobbin winder, thread tension dial, and stitch selection panel before proceeding․
Attaching the Power Cord and Foot Pedal
Before connecting the power, ensure the machine’s power switch is in the “OFF” position․ Locate the power jack on the back of the sewing machine and firmly insert the power cord plug․ Connect the other end of the power cord to a grounded electrical outlet․
Next, attach the foot pedal․ Find the foot pedal jack, typically located on the machine’s front or side․ Insert the foot pedal plug securely into the jack․ Gently test the foot pedal to confirm it’s functioning correctly – pressing it should not activate the machine while the power switch is off․ Proper connection of both the power cord and foot pedal is crucial for safe and reliable operation of your Brother Project Runway sewing machine․
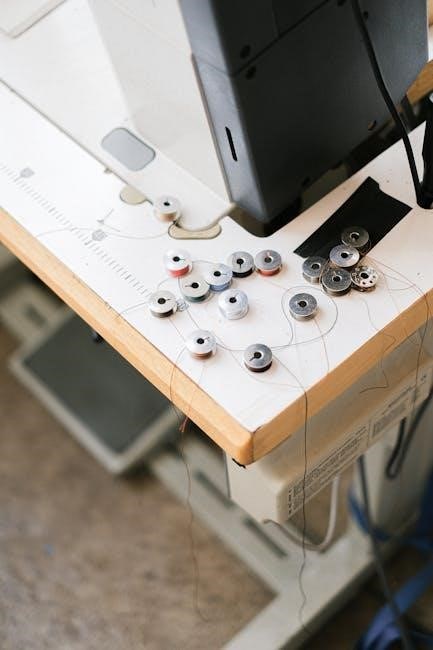
Winding the Bobbin
Begin by placing the spool of thread onto the spool pin, securing it with the spool cap․ Guide the thread through the thread guide, then wrap it several times around the bobbin in a clockwise direction․ Next, insert the bobbin onto the bobbin winder pin, ensuring it clicks into place․
Push the bobbin winder stem to the right and press the foot pedal gently․ The bobbin will begin to wind; Once the bobbin is full, the winder will automatically stop․ Remove the bobbin, cut the thread, and carefully insert it into the bobbin case, ensuring it rotates freely․ Proper bobbin winding is essential for consistent stitch quality and smooth sewing performance with your Brother Project Runway machine․
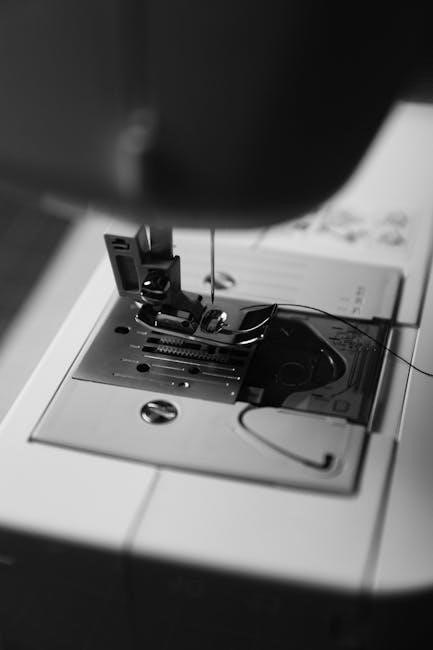
Threading the Upper Thread
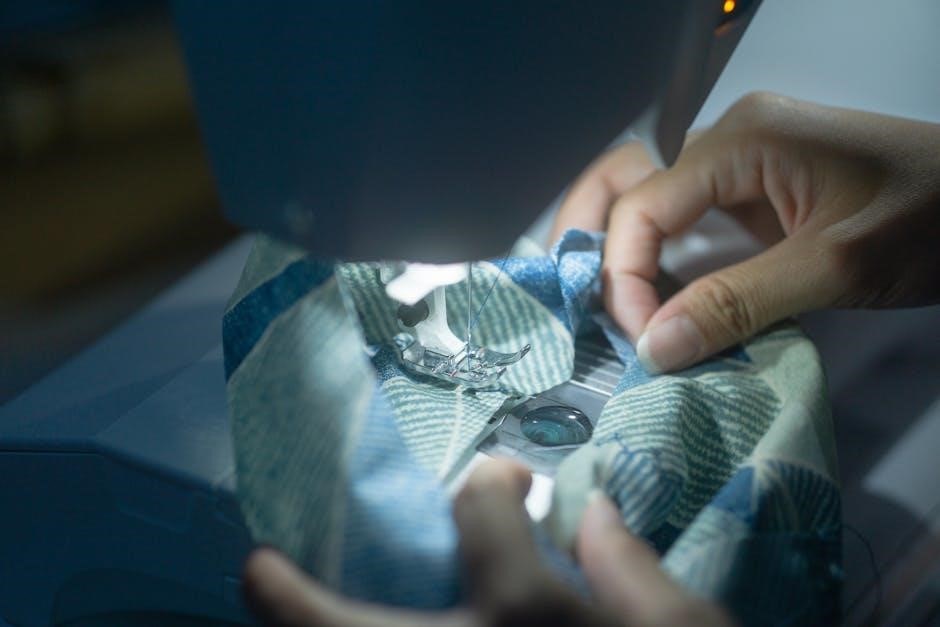
Start by raising the presser foot and the needle to its highest position․ Place the spool of thread on the spool pin, securing it with the spool cap․ Guide the thread through the first thread guide, then down and around the tension disc, ensuring it snaps into place․
Continue threading upwards, following the numbered guides indicated in your machine’s diagram․ Pass the thread through the take-up lever, and then down through the needle clamp․ Finally, thread the needle from front to back․ A correctly threaded machine is crucial for achieving consistent and reliable stitches on your Brother Project Runway sewing machine, preventing issues like thread breakage or skipped stitches․
Threading the Lower Thread (Bobbin)
Begin by ensuring the machine is turned off․ Locate the bobbin winder mechanism, typically on the top or side of the machine․ Place the bobbin on the bobbin winder spindle and secure it․ Guide the thread from the spool to the bobbin, following the designated path, and engage the bobbin winder․
Once the bobbin is full, disengage the winder and remove the bobbin․ Open the bobbin case cover and insert the bobbin, ensuring it rotates in the correct direction as indicated by the diagram․ Draw up the thread end through the slot in the bobbin case․ Proper bobbin threading is vital for balanced stitches and preventing tangled threads within your Brother Project Runway machine․
Basic Sewing Operations
Mastering fundamental techniques is key; this section details stitch selection, length/width adjustments, straight and zigzag sewing, and securing seams effectively․
Selecting Stitch Patterns
Your Brother Project Runway machine offers a diverse range of stitch patterns, extending beyond basic straight and zigzag options․ To select a stitch, locate the stitch selection dial – typically positioned on the front of the machine․ Rotate the dial to browse through the available patterns, clearly illustrated nearby․
Each number or symbol corresponds to a specific stitch, including decorative stitches, stretch stitches, and buttonhole settings․ Refer to the stitch chart within this manual for detailed descriptions and recommended uses for each pattern․
For optimal results, always test the selected stitch on a scrap fabric before beginning your project․ This allows you to verify the stitch appearance and adjust settings as needed․ Remember to consider the fabric type and desired effect when choosing a stitch pattern․
Adjusting Stitch Length and Width
Precise control over stitch length and width is crucial for achieving professional-looking results․ Your Brother Project Runway machine features dedicated dials or buttons for adjusting these parameters․ The stitch length dial controls the distance between each stitch, impacting the fabric’s durability and appearance․ Shorter lengths are ideal for delicate fabrics or reinforcing seams, while longer lengths suit basting or gathering․
The stitch width dial adjusts the breadth of zigzag or decorative stitches; Wider settings create bolder patterns, while narrower settings offer subtle embellishments․
Always test adjustments on scrap fabric to ensure the desired effect before sewing your project․ Refer to the manual’s stitch chart for recommended settings based on fabric type and stitch pattern․
Sewing Straight Stitches
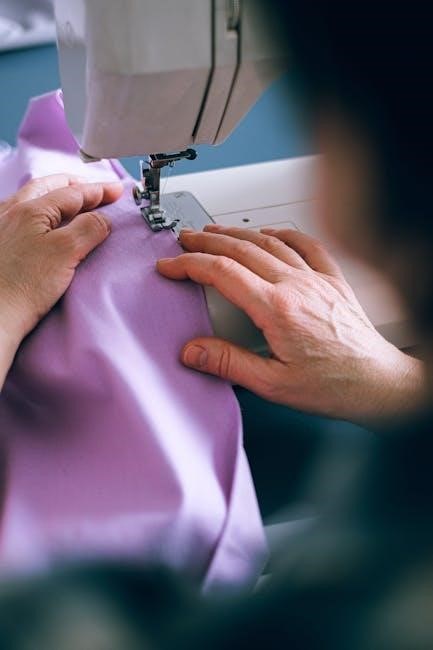
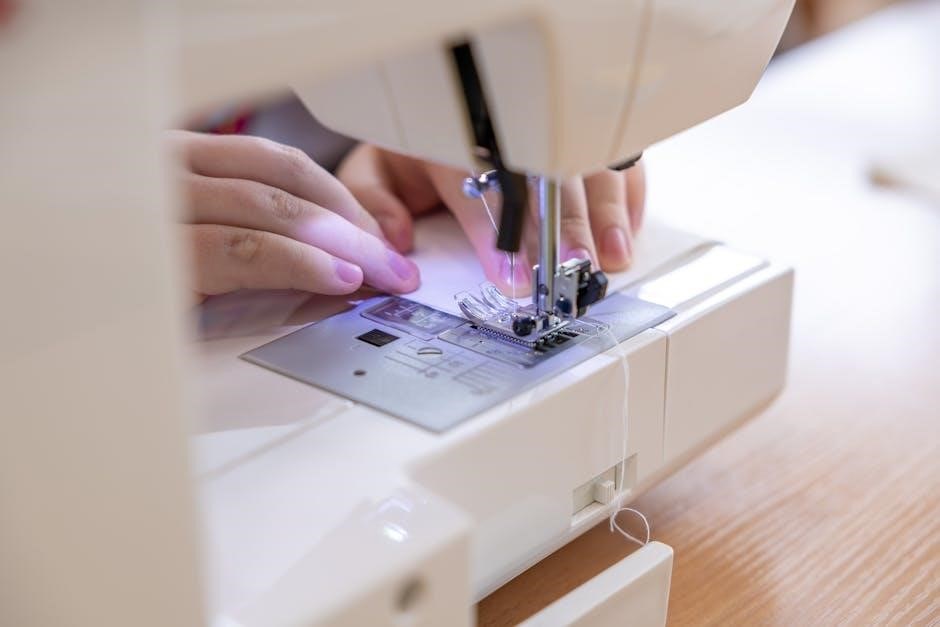
Mastering the straight stitch is fundamental to successful sewing․ Begin by selecting the straight stitch option on your Brother Project Runway machine, typically indicated by a straight line symbol․ Ensure your fabric is positioned correctly under the presser foot, aligning the desired seam allowance with the guide markings on the needle plate․
Gently depress the foot pedal to initiate sewing, guiding the fabric smoothly and consistently․ Avoid pulling or pushing the fabric, allowing the machine to feed it evenly․
Maintain a consistent sewing speed for a uniform stitch line․ Practice on scrap fabric to develop a comfortable rhythm and achieve accurate results․
Sewing Zigzag Stitches
The zigzag stitch offers versatility for various applications, from finishing raw edges to creating decorative embellishments․ Select the zigzag stitch pattern on your Brother Project Runway machine; the symbol usually resembles a series of connected angled lines․ Adjust the stitch width using the designated control to determine the breadth of the zigzag․
A narrower width is ideal for reinforcing edges, while a wider width creates bolder decorative effects․ Practice on scrap fabric to experiment with different width settings and observe the resulting stitch appearance․
Maintain consistent fabric guidance for a uniform zigzag line, and adjust the stitch length as needed for your project․
Backstitching and Securing Seams
Securing seams with backstitching prevents unraveling and ensures the durability of your projects․ At the beginning and end of each seam, activate the backstitch function – typically a button or lever on your Brother Project Runway machine․ Sew a few stitches forward, then engage backstitching and sew backwards over those same stitches for approximately half an inch․
This locks the thread in place․ Repeat this process at the seam’s end․ Consistent backstitching is crucial, especially for garments and items subjected to stress․
Properly secured seams withstand repeated washing and wear, maintaining the integrity of your creations․
Advanced Features & Troubleshooting
Explore specialized functions like needle up/down, speed control, and wireless connectivity, alongside solutions for common issues to maximize your sewing experience․
Using the Needle Up/Down Function
The Needle Up/Down function offers enhanced precision and control during your sewing projects․ This feature allows you to program the machine to stop with the needle either in the up or down position, greatly simplifying tasks like pivoting fabric or creating neat corners․ To activate this function, locate the dedicated button – often depicted with an up and down arrow – on your Brother Project Runway machine․
Pressing this button toggles between the two settings․ When set to ‘Down’, the needle remains lowered when the machine stops, securing the fabric layer and enabling effortless pivoting․ Conversely, ‘Up’ raises the needle, facilitating easy fabric removal for starting a new seam or repositioning the material․ Experiment with both settings to discover which best suits your specific sewing needs and project requirements․ Remember to consult your machine’s display screen for confirmation of the selected position․
Speed Control Settings
Mastering the speed control settings on your Brother Project Runway sewing machine is crucial for achieving optimal results, especially when working with delicate fabrics or intricate designs․ Your machine likely features a slider or dial dedicated to adjusting the maximum sewing speed․ Lowering the speed provides greater control, preventing fabric slippage and ensuring accurate stitch placement․
This is particularly beneficial for beginners or when navigating complex patterns․ Conversely, increasing the speed allows for faster completion of simpler seams and larger projects․ Some models also incorporate a speed limit function, allowing you to set a maximum speed even when fully pressing the foot pedal․ Experiment with different settings to find the ideal balance between speed and precision for each unique project, ensuring consistently beautiful and professional-looking results․
Connecting to a Wireless Network (Infrastructure)
To connect your Brother Project Runway sewing machine to an infrastructure wireless network, begin by accessing the machine’s settings menu, typically through the LCD screen․ Navigate to the network settings and select “Wireless Setup Wizard․” The machine will then scan for available networks․ Choose your desired network from the list and enter the correct password when prompted, ensuring case sensitivity․
Once connected, the machine will display a confirmation message․ This allows access to features like firmware updates and potentially cloud-based design downloads․ Refer to the Brother iPrint&Scan application for PC/Mac for enhanced scanning and workflow functionality․ Ensure a stable wireless signal for reliable connectivity and seamless operation of these features․ A successful connection unlocks the full potential of your machine․
Connecting to a Wireless Network (Adhoc)
Establishing an Adhoc wireless connection with your Brother Project Runway sewing machine requires a slightly different approach than infrastructure mode․ First, you’ll need to create an Adhoc network directly from a computer․ Then, on the sewing machine, navigate to the network settings and select the option for Adhoc connection․ The machine will scan for available Adhoc networks․
Select your newly created network and enter the necessary password or security key․ This method is useful when a traditional wireless router isn’t available․ Remember that Adhoc networks generally have a shorter range and may be less secure․ Once connected, you can proceed with driver and software installation via USB, utilizing the Brother iPrint&Scan application for enhanced functionality․
Driver and Software Installation (USB)
To install the full driver and software package via USB, begin by downloading the appropriate file from the official Brother support website (support․brother․com), selecting your machine’s model and operating system․ Once downloaded, disconnect any existing USB connections to the sewing machine․ Run the downloaded executable file and follow the on-screen prompts․
The installation process will automatically guide you through each step, ensuring all necessary components are installed correctly․ Do not interrupt or cancel any screen during installation․ After completion, connect your Brother Project Runway machine to your computer using a USB cable․ The machine should be recognized, and you can begin utilizing features like iPrint&Scan for enhanced workflow and scanning capabilities․
Driver and Software Installation (Wireless)
For wireless driver and software installation, first ensure your Brother Project Runway sewing machine is connected to your wireless network – refer to the network connection guides for infrastructure or ad-hoc setups․ Download the full driver and software package from the Brother support website (support․brother․com), selecting your model and OS․
Run the downloaded file and follow the on-screen instructions․ The installer will search for your machine on the network․ Select your machine when prompted․ The installation process will automatically install all necessary components․ Once complete, you can utilize features like Brother iPrint&Scan for PC/Mac, accessing scanning and workflow functionality wirelessly․ Ensure a stable network connection throughout the installation;
Firmware Updates and Data Loss Considerations
Regular firmware updates are crucial for maintaining optimal performance and accessing the latest features on your Brother Project Runway sewing machine․ However, updating firmware will delete certain data stored within the machine․ This includes secured print data, your caller ID log, journal reports, and any outgoing message recordings – features vary by model․
Before initiating a firmware update, it’s highly recommended to back up any essential data if possible․ Understand that this data loss is a necessary part of the update process, ensuring compatibility and stability․ Brother strongly advises against interrupting the update process, as this could potentially damage the machine’s internal systems․ Always follow the official update instructions carefully․
Troubleshooting Common Sewing Issues
Encountering problems while sewing is common, but many are easily resolved․ If your machine isn’t sewing, re-thread both the upper and lower threads, ensuring proper tension․ Check the needle – is it bent or damaged? A new needle is often the solution․ For skipped stitches, verify the needle is correctly inserted and the correct type for your fabric․
Thread bunching underneath the fabric usually indicates incorrect threading or tension․ If the machine jams, stop immediately, raise the presser foot, and carefully remove the fabric․ Refer to the manual’s diagrams for correct threading paths․ If issues persist, consult Brother’s self-serve support resources online for detailed guidance․
Maintenance and Care
Regular cleaning and lubrication are vital for maintaining your Brother Project Runway machine, ensuring smooth operation and extending its lifespan for years to come․
Cleaning Your Sewing Machine
Consistent cleaning prevents lint and dust buildup, crucial for optimal performance․ Always unplug the machine before cleaning! Use a soft brush to remove lint from the bobbin area, feed dogs, and needle plate after each use․ For tougher buildup, a vacuum cleaner with a brush attachment works well․
Periodically wipe down the exterior with a damp cloth – avoid harsh chemicals․ Clean around the needle clamp and under the presser foot․ A small amount of compressed air can dislodge debris in hard-to-reach areas․ Never lubricate before cleaning, as this attracts more dust․ Regular cleaning extends the life of your Brother Project Runway machine and ensures consistently beautiful stitches․
Oiling and Lubrication
Proper lubrication ensures smooth operation and prevents wear and tear on your Brother Project Runway machine․ Only use sewing machine oil specifically designed for this purpose; other oils can damage internal components․ Apply a small drop of oil to the designated oiling points – consult your machine’s diagram within the full manual for precise locations․
Typically, these include the bobbin race, hook assembly, and any areas indicated in the manual․ Avoid over-oiling, as excess oil attracts lint․ After oiling, run the machine briefly to distribute the lubricant․ Regular, careful oiling, combined with consistent cleaning, will significantly extend the lifespan of your sewing machine and maintain its peak performance․
Genuine Brother Supplies (Drum Units & Toner)
While primarily a sewing machine manual, it’s important to note Brother’s recommendation regarding supplies for their broader product line․ Brother strongly advises using only genuine Brother drum units and toner cartridges with compatible Brother printers and all-in-one devices․ Utilizing non-genuine supplies may compromise print quality, potentially damage the machine, and could void your warranty․
Genuine Brother supplies are engineered to work seamlessly with your Brother equipment, ensuring optimal performance and reliability․ They are rigorously tested to meet Brother’s high standards for quality and durability․ Though seemingly unrelated to sewing, this reflects Brother’s commitment to quality across all their products, including your Project Runway machine․