
Honeywell Non-Programmable Thermostat Manual PDF: A Comprehensive Guide
Navigating Honeywell’s offerings requires readily available documentation; this guide focuses on accessing and utilizing the PDF manuals for their non-programmable thermostat models‚ ensuring optimal performance.
Understanding Honeywell Non-Programmable Thermostats
Honeywell non-programmable thermostats represent a straightforward approach to home climate control‚ differing significantly from their programmable counterparts. These models prioritize simplicity‚ offering manual temperature adjustments without the complexities of scheduling or advanced settings. They are ideal for users who prefer consistent temperatures or those with simple heating and cooling needs.
Unlike programmable thermostats‚ which allow for customized temperature schedules‚ non-programmable units require manual intervention for each temperature change. This makes them exceptionally user-friendly‚ particularly for individuals unfamiliar with advanced thermostat features. The core function revolves around a simple interface – typically a dial or buttons – to set the desired temperature.
These thermostats are often chosen for their reliability and ease of installation. While lacking the energy-saving potential of programmable models‚ they provide dependable temperature regulation. Understanding this fundamental difference is crucial when consulting the manual PDF‚ as instructions will focus on manual operation rather than schedule programming.
What is a Honeywell Non-Programmable Thermostat?
A Honeywell non-programmable thermostat is a climate control device designed for manual temperature regulation within a home or building. It operates without the ability to set pre-defined temperature schedules‚ relying instead on user-initiated adjustments. This contrasts with programmable models that automate temperature changes based on time and day.
These thermostats typically feature a simple interface‚ often a dial or push buttons‚ allowing users to directly set the desired heating or cooling temperature. They are engineered for ease of use‚ making them suitable for individuals who prefer a straightforward approach to climate control. The focus is on immediate responsiveness to temperature adjustments.
The Honeywell Pro Series‚ mentioned in available resources‚ exemplifies this simplicity while offering modern features. Accessing the correct manual PDF is vital for understanding the specific functionalities of your model‚ ensuring proper operation and maximizing its benefits. They are a reliable choice for consistent comfort without complex programming.
Key Features of Honeywell Non-Programmable Models
Honeywell non-programmable thermostats prioritize simplicity and reliability. Core features include intuitive temperature control‚ typically via a dial or buttons‚ allowing for immediate adjustments to heating and cooling settings. These models often boast a clear‚ easy-to-read display showing the current and set temperatures.

Many incorporate a manual changeover switch for selecting between heating‚ cooling‚ and off modes. While lacking scheduling capabilities‚ they provide consistent temperature maintenance based on user input. The Honeywell Pro Series‚ as noted‚ demonstrates this blend of functionality and user-friendliness.
Accessing the relevant manual PDF unlocks detailed information about specific model features‚ including fan control options (Auto/On) and battery requirements. Understanding these features‚ detailed in the manual‚ ensures optimal performance and longevity. They represent a cost-effective and straightforward climate control solution.

Finding the Correct Manual PDF
Locating the appropriate PDF manual requires pinpointing the official Honeywell resources and utilizing precise search terms‚ including your thermostat’s specific model number.
Locating the Official Honeywell Website
The primary source for authentic Honeywell documentation is their official website. Begin by navigating to Honeywell Home. This site serves as the central repository for all product-related information‚ including downloadable manuals. Be cautious of third-party websites claiming to host Honeywell manuals‚ as these may contain outdated or inaccurate information‚ or even pose security risks.
Once on the Honeywell Home website‚ utilize the search function. Look for a clearly labeled “Support” or “Downloads” section. These areas are specifically designed to help customers find the resources they need for their Honeywell products. The website’s structure may change over time‚ so familiarize yourself with the current layout to efficiently locate the manual section. Directly accessing Honeywell’s official site guarantees you’re receiving the most current and reliable documentation for your non-programmable thermostat.
Searching for Your Specific Model Number
Identifying your thermostat’s precise model number is crucial for downloading the correct manual. This number is typically found on a label located on the back of the thermostat itself‚ or on the original packaging. It’s a combination of letters and numbers‚ uniquely identifying your specific model.
Once you have the model number‚ return to the Honeywell Home website’s support or downloads section. Enter the complete model number into the search bar. Avoid using partial numbers or approximations‚ as this can yield inaccurate results. The search function should then display a list of relevant manuals and documentation. Carefully review the search results to ensure the manual matches your thermostat’s model. Downloading the wrong manual can lead to confusion and improper operation.
Identifying Manual Versions and Revisions
Honeywell frequently updates its manuals to reflect product improvements‚ address common issues‚ or clarify instructions. Therefore‚ it’s vital to identify the latest version or revision of the manual for your thermostat model. Manuals often display a “Revision Date” or “Version Number” prominently on the cover page or within the document’s header/footer.
When multiple versions are available‚ prioritize downloading the most recent one. Older versions may contain outdated information or lack crucial details about newer features. The Honeywell website typically lists manuals in descending order by revision date‚ making it easier to locate the latest version. Always cross-reference the manual’s model number with your thermostat to confirm compatibility before relying on its instructions.

Thermostat Installation & Setup
Proper installation is crucial for accurate operation; consult the manual PDF for detailed wiring diagrams‚ compatibility checks‚ and secure mounting procedures before beginning setup.
Checking Compatibility with Your HVAC System
Before initiating installation‚ verifying compatibility between the Honeywell non-programmable thermostat and your existing Heating‚ Ventilation‚ and Air Conditioning (HVAC) system is paramount. The manual PDF provides essential guidance on supported system types – including gas‚ oil‚ and electric furnaces‚ as well as heat pumps.
Carefully review the voltage requirements outlined in the manual; most Honeywell non-programmable thermostats operate on 24V systems. Incorrect voltage can cause damage to the thermostat or your HVAC equipment. The PDF will detail how to identify your system’s voltage.
Pay close attention to the wiring configuration. The manual includes compatibility charts indicating which wire colors correspond to specific functions (e.g.‚ R‚ W‚ Y‚ G). Ensure your HVAC system utilizes a wiring scheme supported by the thermostat. If you have a high-efficiency furnace or a multi-stage system‚ consult the manual for specific compatibility notes and potential adapter requirements. Ignoring these steps could lead to malfunction or safety hazards.
Wiring Diagrams and Color Codes
The Honeywell non-programmable thermostat manual PDF contains detailed wiring diagrams crucial for correct installation. These diagrams illustrate the connections between the thermostat terminals and your HVAC system’s wires. Understanding these diagrams is vital‚ even if you’re a seasoned DIYer.
Typically‚ common wire colors are standardized: R (power)‚ W (heat)‚ Y (cooling)‚ G (fan)‚ and C (common). However‚ color coding can vary. The manual provides a comprehensive color code chart specific to Honeywell models‚ clarifying potential discrepancies.
Carefully compare the wiring diagram in the manual to your existing thermostat’s wiring. Note any differences and consult a qualified HVAC technician if unsure. The PDF often includes multiple diagrams for different system configurations (e.g.‚ heat pump‚ conventional furnace). Incorrect wiring can damage your system‚ so double-check all connections before powering on.
Mounting the Thermostat Base
The Honeywell non-programmable thermostat manual PDF provides step-by-step instructions for securely mounting the thermostat base to the wall. Begin by turning off power to your HVAC system at the breaker box – a critical safety precaution. Remove your old thermostat‚ carefully noting the wire connections.
Using the included mounting screws and wall anchors (if needed)‚ position the base plate on the wall. Ensure it’s level for accurate temperature readings. The manual details proper screw placement and anchor usage for various wall types.
Feed the thermostat wires through the opening in the base plate. Connect the wires to the corresponding terminals‚ referencing the wiring diagram. Once connected‚ gently push any excess wire back into the wall. Finally‚ snap the thermostat body onto the base‚ verifying a secure fit before restoring power.

Operating Your Honeywell Thermostat
The Honeywell manual PDF details simple operation: adjust temperature using the dial‚ select heat or cool‚ and manage fan settings for comfortable‚ consistent climate control.
Setting the Temperature
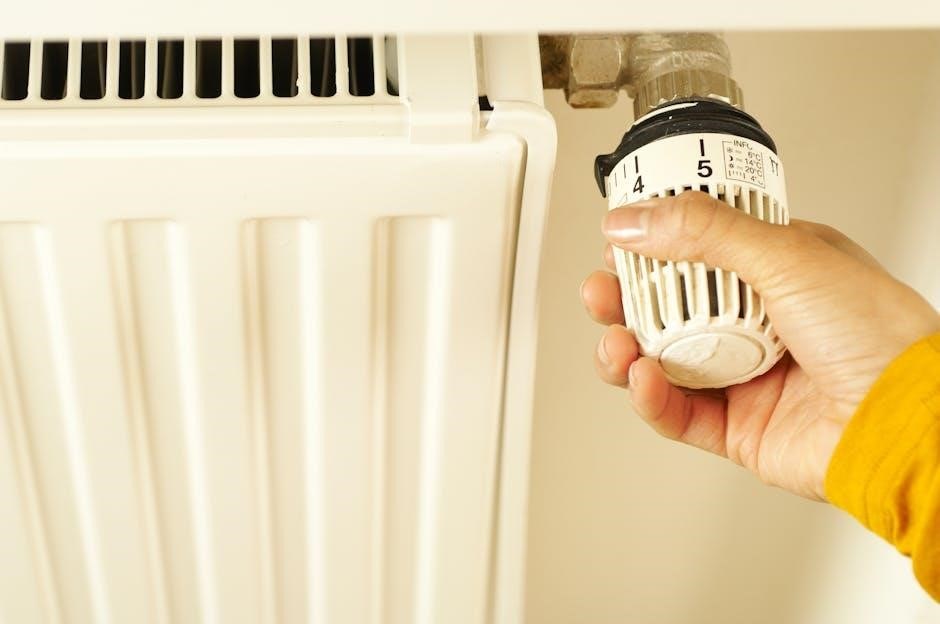
According to the Honeywell manual PDF‚ setting the desired temperature on your non-programmable thermostat is a straightforward process. Typically‚ these models feature a dial or slider mechanism. Rotate the dial clockwise to increase the set temperature and counter-clockwise to decrease it. The current setpoint will be clearly displayed on the thermostat’s screen.
It’s important to note that the temperature scale (Fahrenheit or Celsius) is usually fixed during manufacturing‚ but some models may offer a switch to change it. Refer to your specific model’s manual PDF for details on this feature. Allow sufficient time – often several minutes – for the thermostat to register the change and signal your HVAC system to adjust accordingly.
For precise temperature control‚ avoid making rapid or frequent adjustments. Small‚ incremental changes are recommended. The manual PDF also emphasizes the importance of considering factors like room size‚ insulation‚ and external weather conditions when selecting a comfortable temperature setting.
Switching Between Heat and Cool Modes
The Honeywell non-programmable thermostat manual PDF details how to transition between heating and cooling modes. Most models utilize a clearly labeled switch‚ often positioned on the side or top of the thermostat. This switch typically has three positions: “Heat‚” “Cool‚” and “Off.”
To activate heating‚ move the switch to “Heat.” The thermostat will then call for heat when the room temperature falls below the setpoint. Conversely‚ selecting “Cool” will initiate cooling when the temperature exceeds the setpoint. Ensure your HVAC system is configured for the selected mode before switching.
The “Off” position disables both heating and cooling. The manual PDF stresses the importance of verifying the correct mode selection‚ especially during seasonal changes‚ to avoid unnecessary energy consumption and ensure optimal comfort. Some models may feature indicator lights to confirm the active mode.
Fan Control Options (Auto & On)
Honeywell non-programmable thermostat manuals PDF explain the fan control settings‚ typically offering “Auto” and “On” options. The “Auto” setting operates the fan only when the heating or cooling system is actively running‚ promoting energy efficiency and consistent temperature distribution. This is the recommended setting for most users.
Selecting “On” forces the fan to run continuously‚ regardless of whether heating or cooling is demanded. This can improve air circulation and filter air more consistently‚ but it also increases energy consumption. The manual PDF advises using the “On” setting cautiously‚ particularly in humid climates.
The location of the fan control switch varies by model‚ but it’s usually near the temperature setting controls. Refer to your specific model’s manual for precise instructions and diagrams. Understanding these options allows for personalized comfort and optimized energy usage;

Troubleshooting Common Issues
PDF manuals detail solutions for typical problems like unresponsive systems‚ inaccurate readings‚ or power failures‚ guiding users through diagnostic steps for effective resolution.
Thermostat Not Powering On
If your Honeywell non-programmable thermostat fails to display any readings or respond to adjustments‚ consult the manual’s troubleshooting section immediately. The PDF guide emphasizes checking the battery compartment first‚ ensuring correct battery installation with proper polarity.
Verify the battery type matches the thermostat’s requirements – often AA or AAA – and that they aren’t depleted. A low battery indicator‚ if present‚ should be heeded. Next‚ examine the wiring connections at the thermostat base and the HVAC system.
Loose wires or a disconnected power supply are common culprits. The manual’s wiring diagrams are crucial here. If wiring appears secure and batteries are new‚ a blown fuse within the HVAC system might be the issue‚ requiring a qualified technician. The PDF also advises against attempting repairs beyond basic battery replacement.
Inaccurate Temperature Readings
When your Honeywell thermostat displays temperatures significantly different from the actual room temperature‚ the manual PDF directs users to first check for obstructions near the thermostat. Curtains‚ furniture‚ or direct sunlight can all influence readings.
Ensure the thermostat isn’t located near heat sources like lamps or appliances. The manual stresses the importance of proper airflow around the unit. Next‚ verify the thermostat is level; an unlevel installation can affect accuracy.
If the issue persists‚ the PDF suggests a calibration procedure‚ if available for your specific model. This involves comparing the thermostat’s reading to a known accurate thermometer and adjusting accordingly. The manual’s troubleshooting section details this process. Finally‚ consider potential drafts or air leaks impacting the room’s temperature.
HVAC System Not Responding
If your Honeywell thermostat isn’t activating your heating or cooling system‚ the manual PDF advises checking the circuit breaker first. A tripped breaker is a common cause. Next‚ verify the thermostat is set to the correct mode – Heat‚ Cool‚ or Off – and that the set temperature is appropriately higher or lower than the current room temperature.
The manual emphasizes inspecting the wiring connections at both the thermostat and the HVAC unit. Loose or disconnected wires can prevent communication. Refer to the wiring diagrams within the PDF for your specific model.
If wiring appears correct‚ the manual suggests testing the batteries (if applicable). Low batteries can sometimes cause intermittent or complete system failure. Finally‚ consult a qualified HVAC technician if the problem persists‚ as it may indicate an issue with the HVAC system itself.

Battery Information & Replacement
The manual PDF details required battery types‚ sizes‚ and provides step-by-step instructions for safe and efficient replacement‚ alongside low-battery indicator explanations.
Battery Type and Size
Determining the correct battery type and size is crucial for your Honeywell non-programmable thermostat’s reliable operation. The manual PDF will explicitly state the required specifications‚ but commonly‚ these thermostats utilize alkaline batteries.
Most models require two AA batteries‚ although some older or specific versions might use AAA batteries. Always refer to your specific model’s manual to confirm. Using incorrect battery types can lead to inaccurate temperature readings‚ thermostat malfunction‚ or even potential damage to the internal components.
The PDF manual often includes a diagram illustrating the battery compartment and proper battery orientation. It’s important to insert the batteries with the correct polarity (+ and -) as indicated. High-quality alkaline batteries are recommended for extended life and consistent performance. Avoid mixing old and new batteries‚ or different battery brands‚ as this can reduce overall battery life and potentially cause issues.
Replacing the Batteries
When your Honeywell thermostat displays a low battery indicator‚ or if you notice erratic behavior‚ it’s time for a battery replacement. The manual PDF provides step-by-step instructions‚ but the process is generally straightforward.
First‚ locate the battery compartment‚ usually on the front or side of the thermostat. Gently remove the thermostat cover – it may snap off or require a small screwdriver. Then‚ carefully remove the old batteries‚ noting their orientation (+ and -). Insert the new batteries‚ ensuring correct polarity as indicated inside the compartment.
Once the batteries are in place‚ reattach the thermostat cover. The thermostat should power back on automatically. The manual PDF may advise resetting the thermostat after battery replacement to ensure accurate time and temperature settings. Dispose of old batteries responsibly‚ following local regulations for battery recycling.
Low Battery Indicator
The Honeywell non-programmable thermostat manual PDF details the importance of the low battery indicator. This feature is crucial for maintaining consistent operation and preventing unexpected temperature fluctuations. Typically‚ a flashing display or a specific icon signals low battery levels.
Ignoring this warning can lead to inaccurate temperature readings or even complete thermostat failure. The manual emphasizes that even if the thermostat appears to be functioning‚ low batteries can compromise its accuracy. It’s recommended to replace the batteries immediately upon seeing the indicator.
The PDF also clarifies that the indicator may appear intermittently before becoming constant‚ giving you advance notice. Don’t delay replacement; proactive battery changes ensure your HVAC system continues to operate efficiently and reliably‚ as intended by Honeywell’s design.